Automations
CoderFlow supports two automation scopes:
- Personal automations are configured under Profile Settings -> Automations. They run as their owner using that user's current permissions, AI provider account, Git credentials, preferences, and concurrency limits. Their resulting tasks are private by default.
- Environment automations are configured under Administration -> Environments -> Automations and managed by environment administrators. They run with the environment automation identity and can target tasks, deployment profiles, docs publishes, or IBM i source imports from a schedule, manual run, inbound webhook, or SCM polling.
Each automation belongs to one environment. An IBM i environment automation with the auto-commit outcome commits and pushes imported sources directly instead of creating a task.
Where to Manage
To manage your own schedules, open the user menu, select Profile Settings, and open Automations. This view lists your personal automations across every environment where you have both automations:use and tasks:create.
To manage shared operational automations, open Administration -> Environments, select an environment, and open Automations. Environment Admins with automations:manage can manage these shared automations in the web UI. Personal automations do not appear on the environment page, and Profile Settings shows only the signed-in user's schedules. Cross-user personal-automation administration is currently available through the automation API only.
Server Admins can also open the Webhooks subtab. Webhook management remains server-admin-only.
Creating a Personal Automation
Open Profile Settings -> Automations, then click Add Automation. Select the environment the scheduled task belongs to. Personal automations support:
- A required daily, weekly, monthly, recurring, or custom cron schedule
- An explicit IANA timezone, defaulting to your browser timezone
- Custom instructions or an environment task template
- Agent, model, effort, and task-name overrides
- Optional completion notifications
- Optional sharing of resulting tasks; sharing is off by default
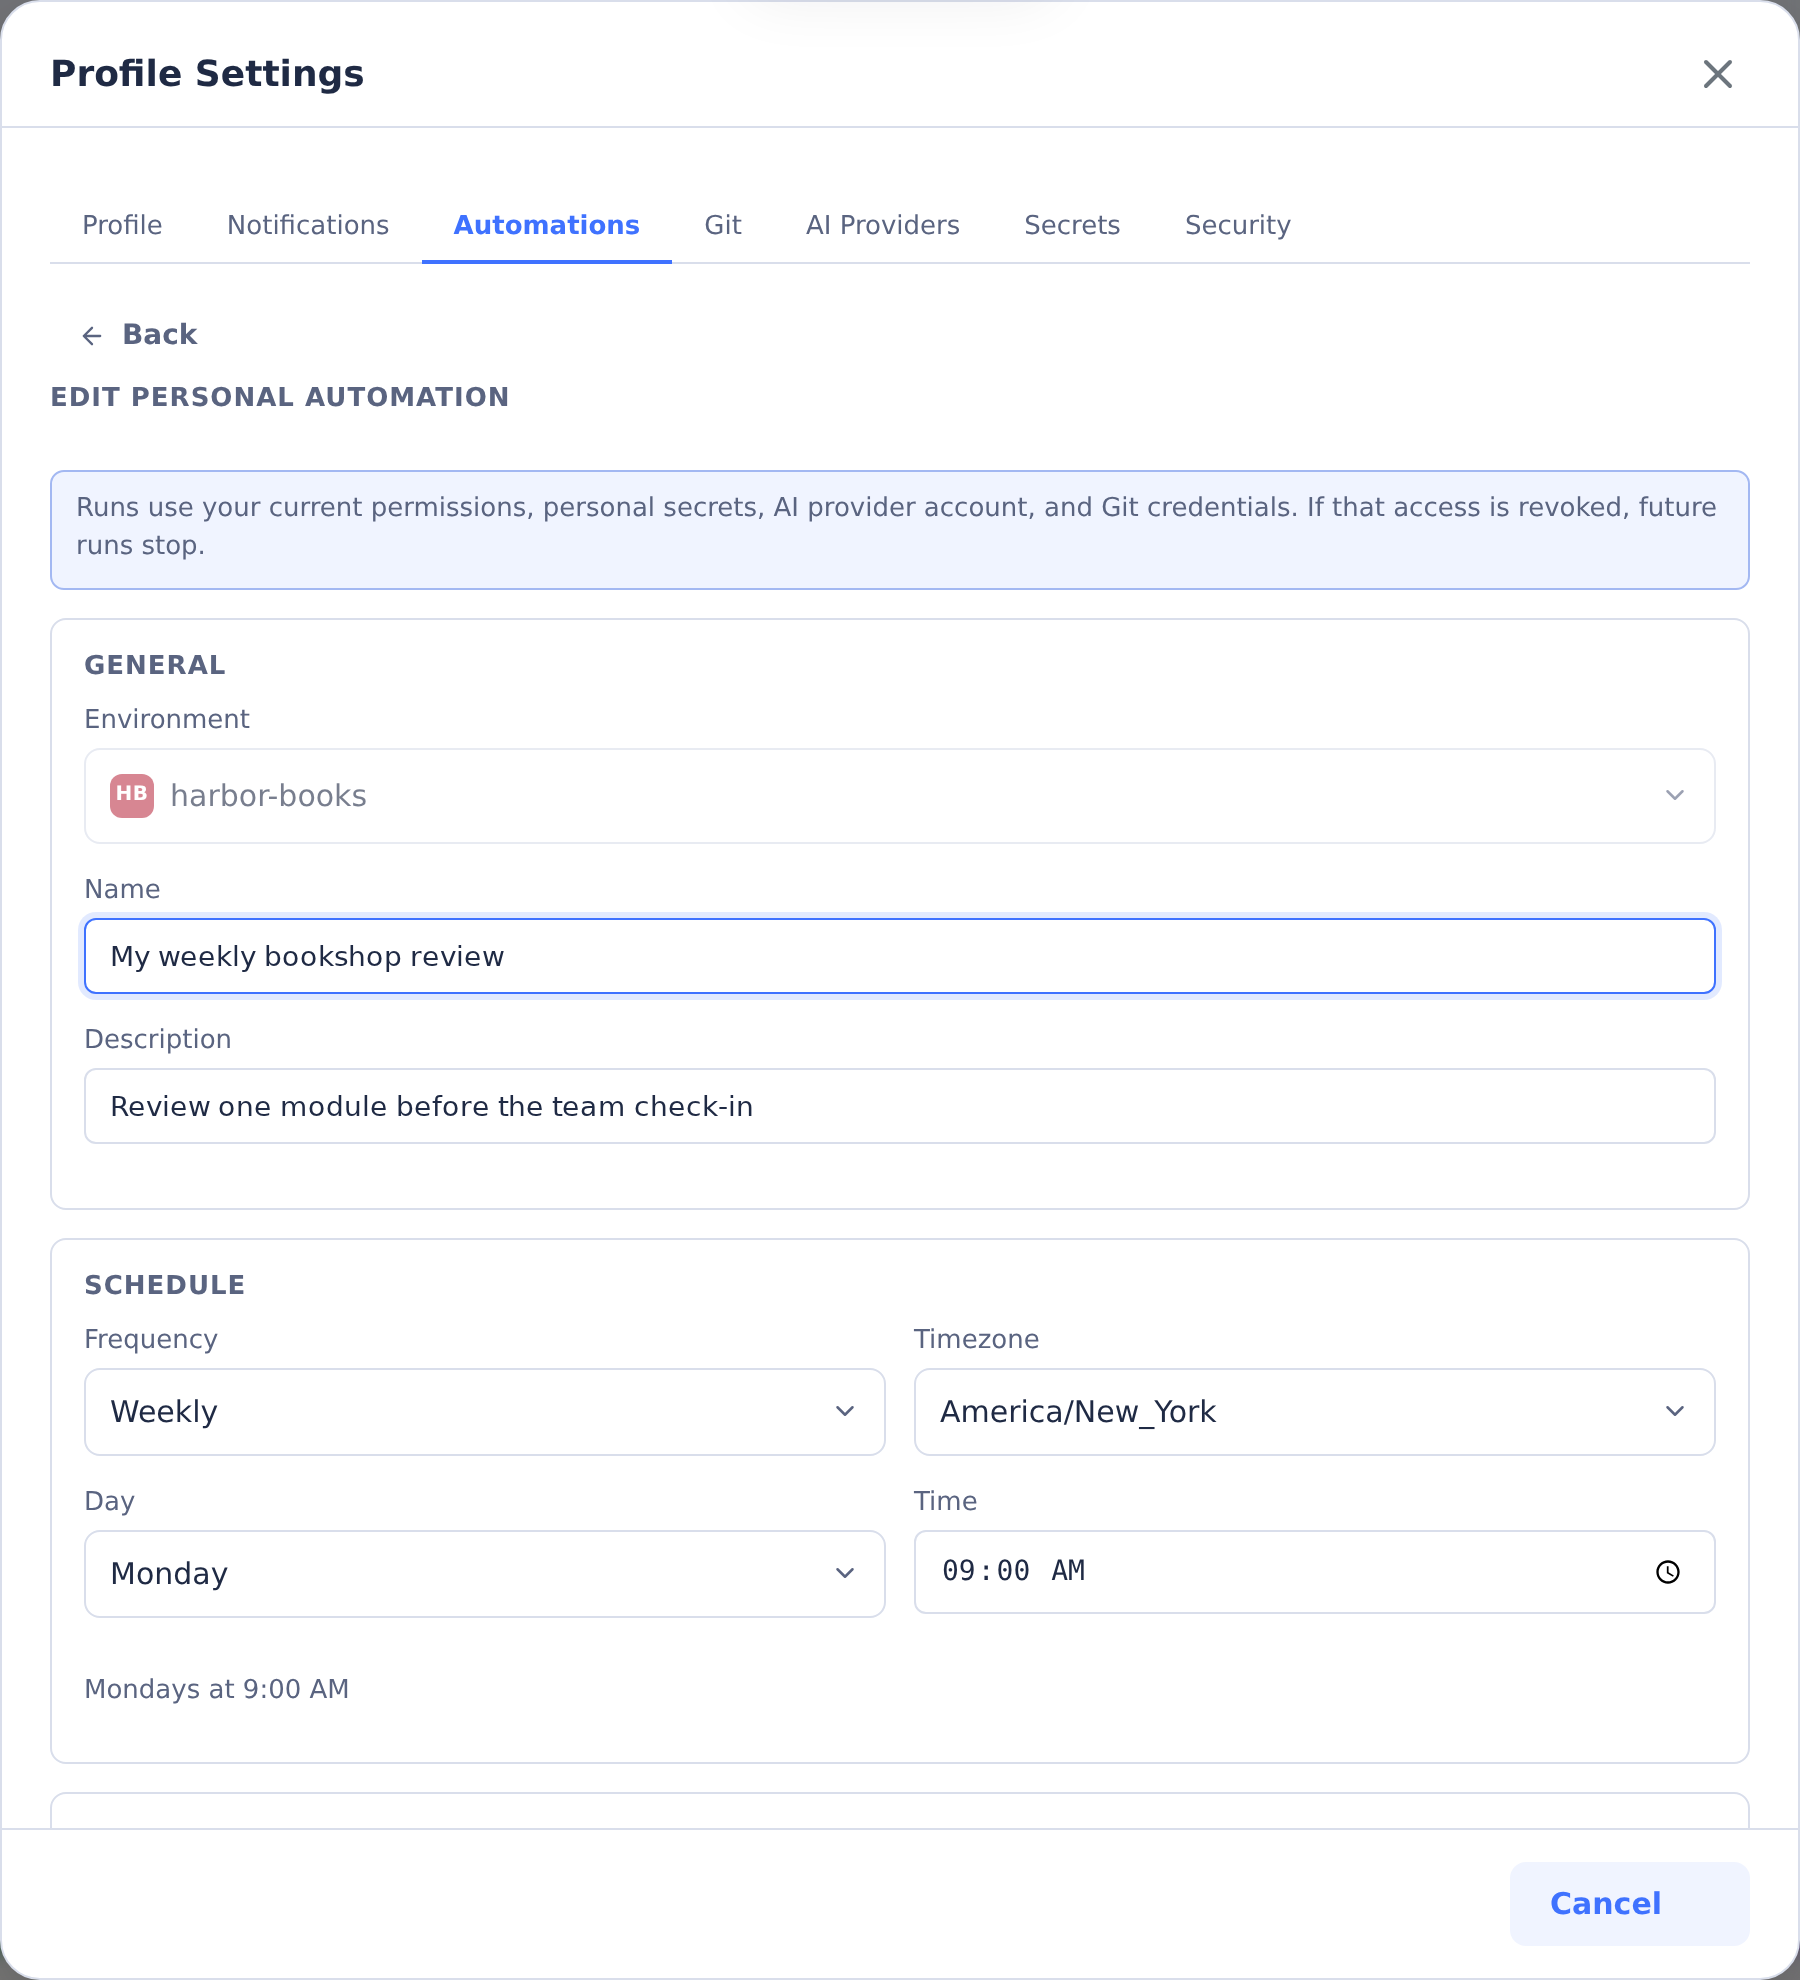
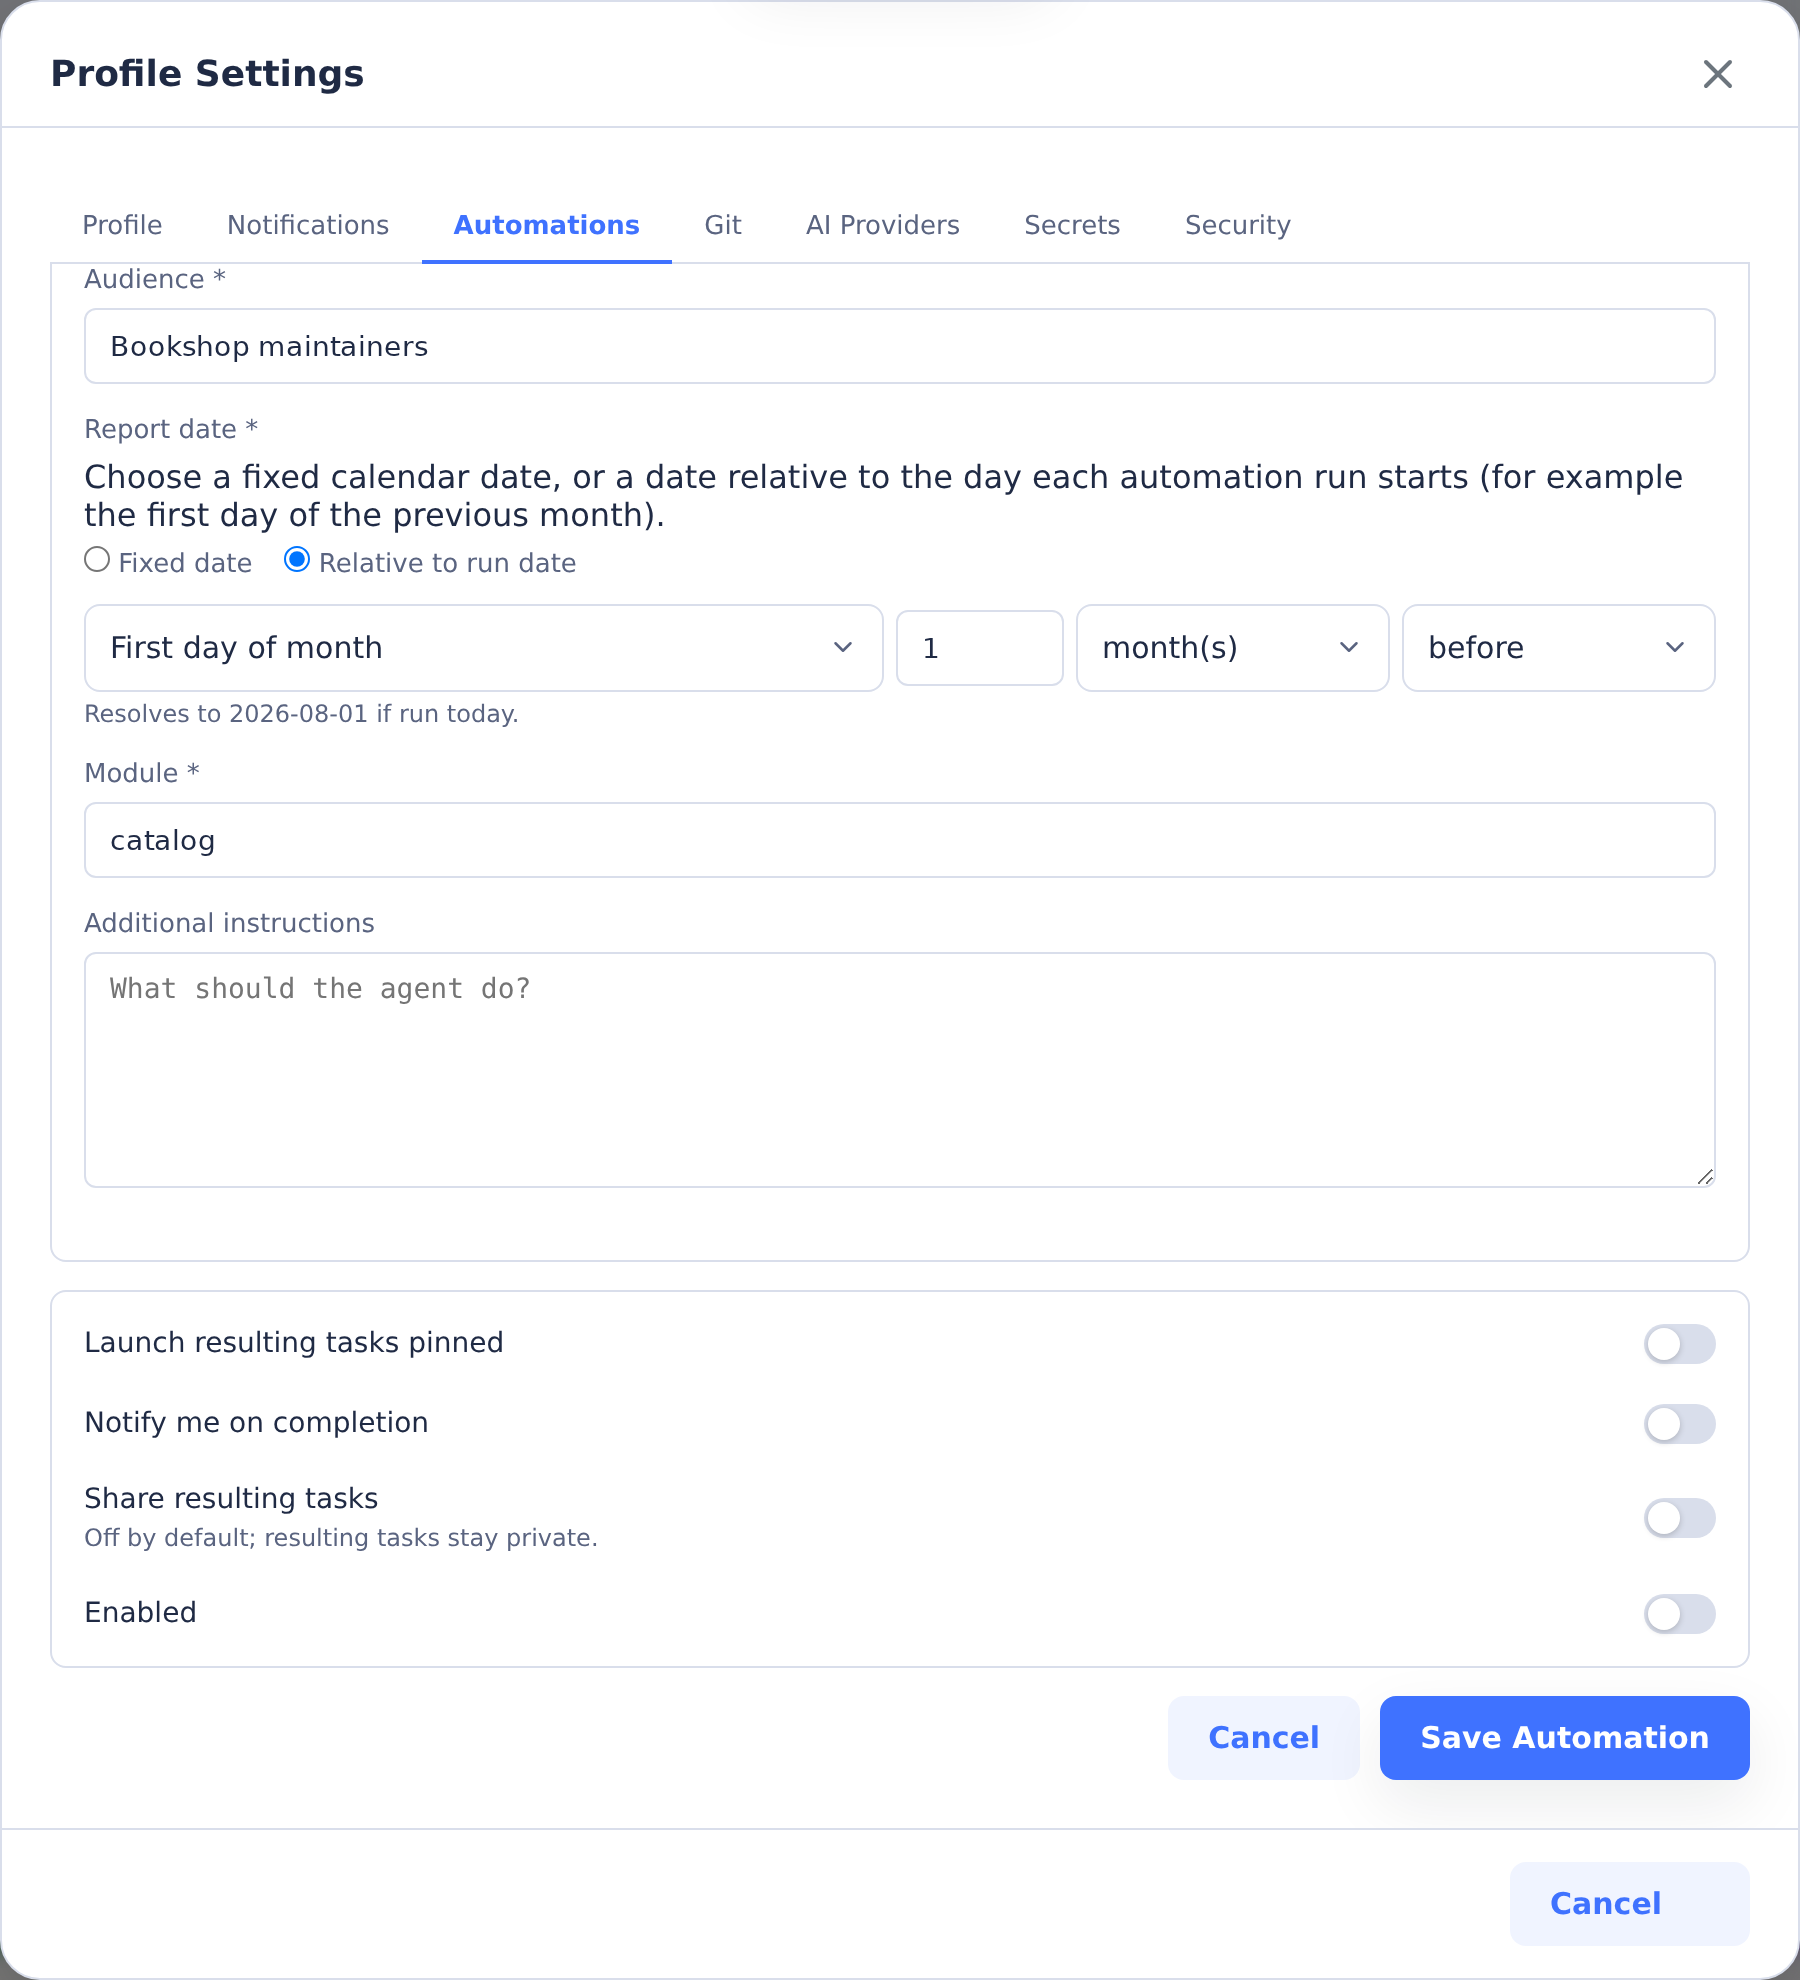
Leave Enabled off while preparing an automation. Share resulting tasks controls whether its task results are shared.
Personal automations do not support webhook-only schedules, SCM polling, deployments, docs publishing, or IBM i imports. Those targets remain shared environment operations.
The owner and permissions are checked again before every run. If the owner was deleted, permanently loses automations:use or tasks:create, or has an AI/Git account that must be reconnected, CoderFlow records a blocked run with remediation guidance and disables the automation. A transient identity, permission, or provider failure records the unsuccessful attempt but leaves the schedule enabled so a later run can retry.
Creating an Environment Automation
Open the selected environment's Automations tab and click Add Automation. Choose a Run Target card first:
- Custom instructions for an agent task using instructions you write
- Task template for an agent task using a saved environment template and parameter values
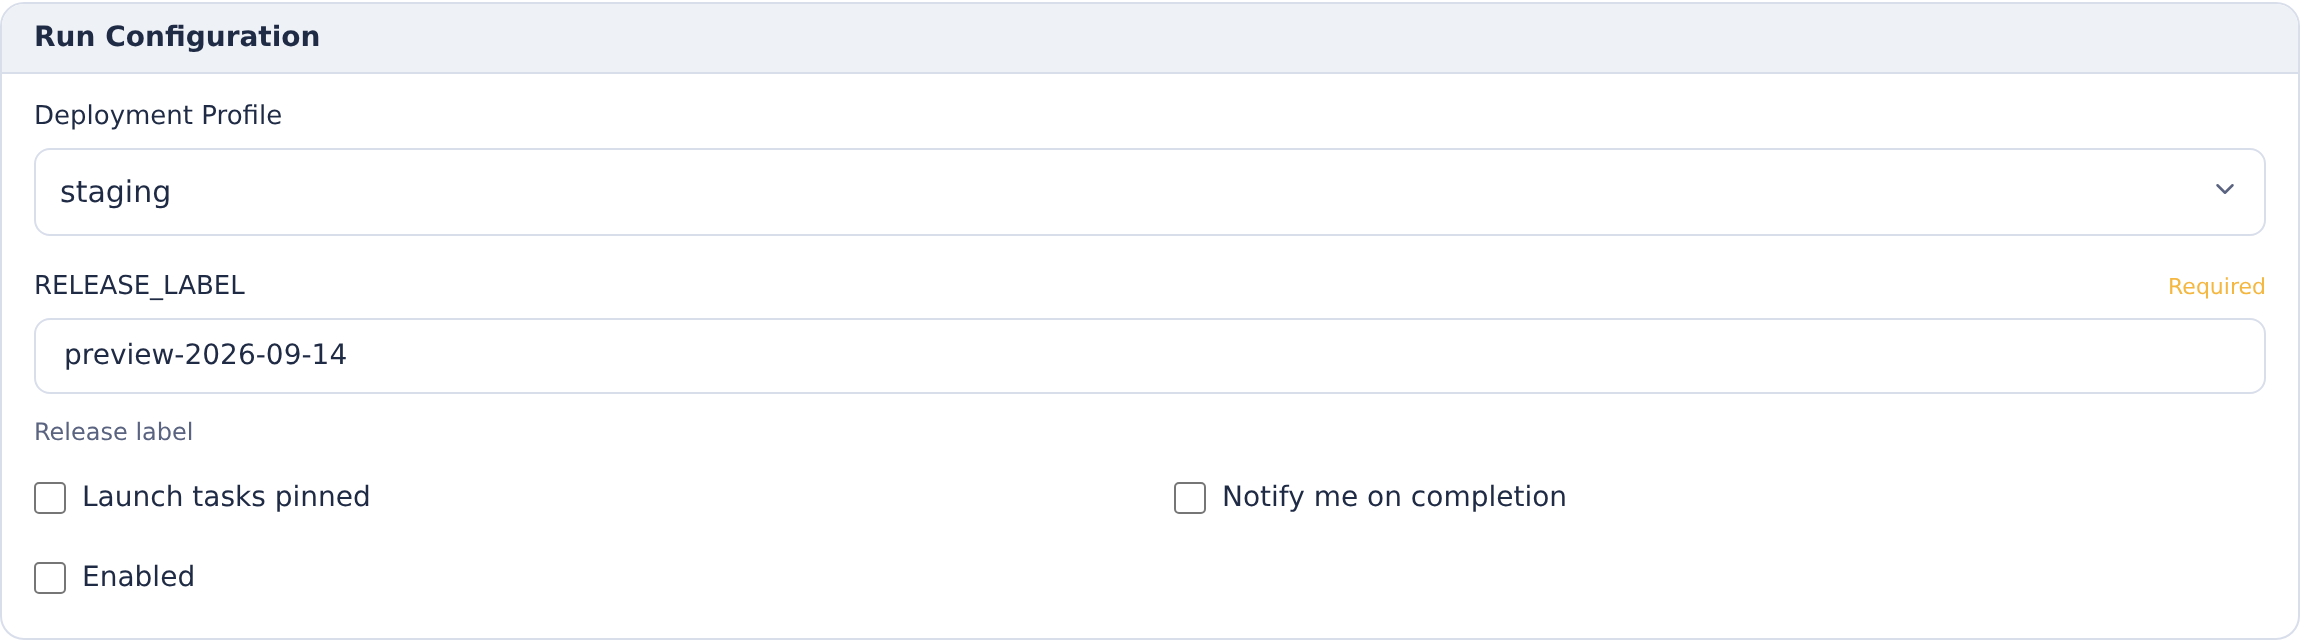
- Deployment profile to run an environment deployment profile with parameter values
- Publish docs to republish a repository's hosted docs site; when the published docs already match the branch head, the run completes without creating a task
- IBM i Import to pull changed IBM i sources on each run (see IBM i Import Automations)
Then work through the panels below:
- General — enter a Name and optional Description.
- Schedule — choose a Timezone and Frequency: None (webhook only), At a set time, Monthly, Recurring, or Advanced: Cron. At a set time lets you choose days and a time for daily or weekly schedules. Monthly supports one or more days (1–28); Recurring supports an interval with an optional time window and days.
- Agent — for Custom instructions and Task template, choose an agent and any available model or effort/reasoning overrides.
- Run Configuration — fill in the fields for the selected target. Task targets include Task Name Template (supports
{{date}},{{datetime}}and relative dates), plus Instructions or a Task Template, its parameters and optional Additional Instructions. Other targets show their deployment, docs repository or IBM i import fields here. Review Launch tasks pinned, Notify me on completion and Enabled as appropriate.
Click Save. Validation errors appear beside the affected fields, with a count in the banner and focus on the first invalid field. Editing a field clears its error. Leave Enabled off to keep the automation inactive until you are ready.
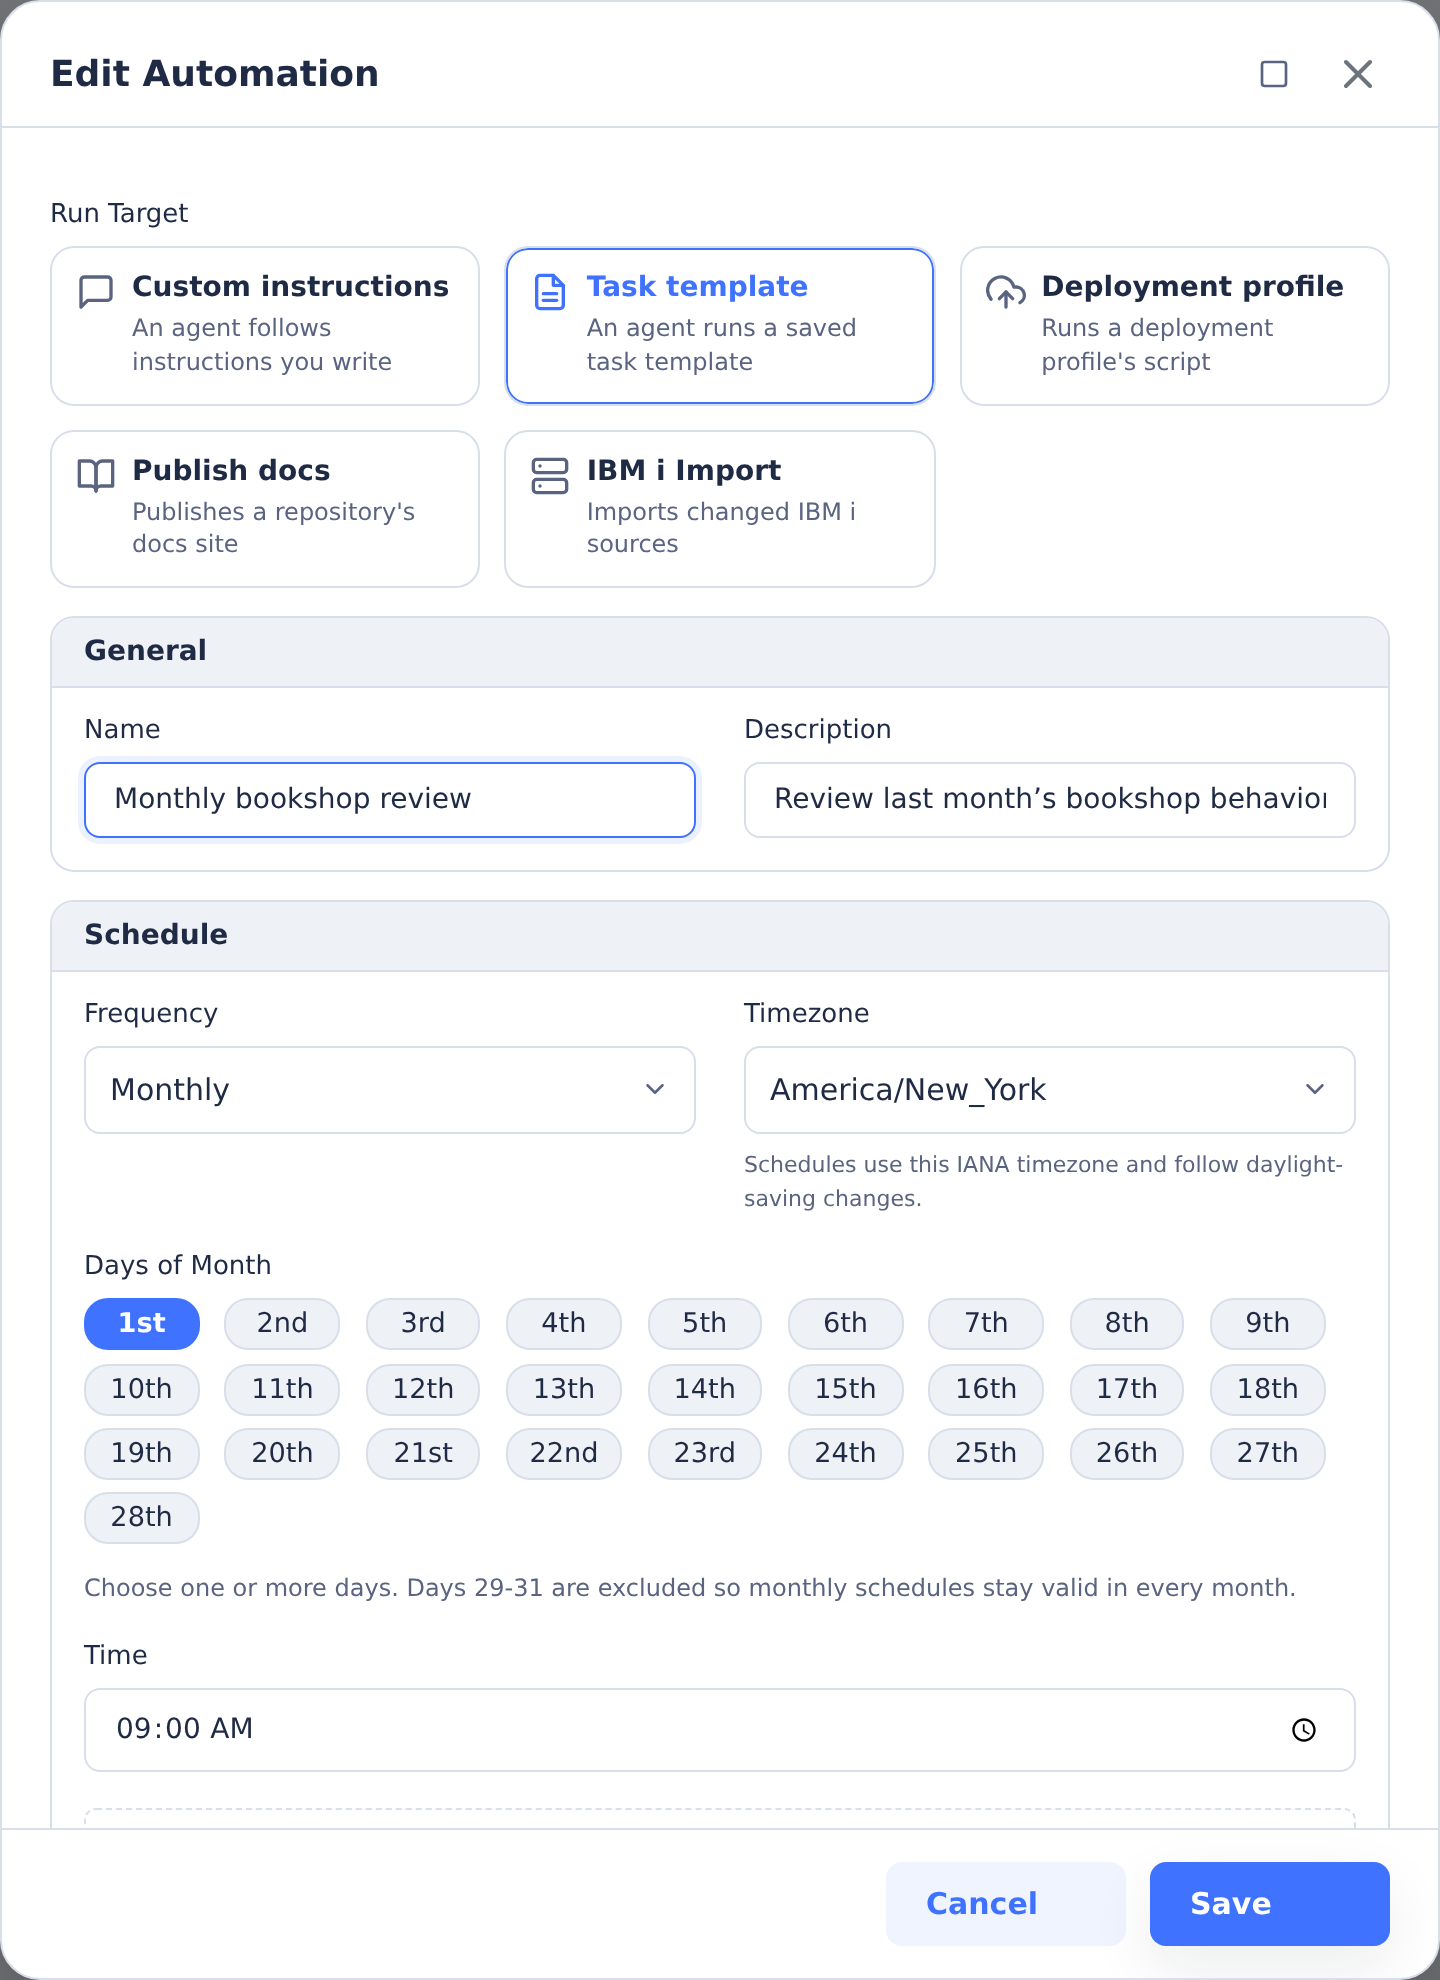
The environment editor also offers operational targets. Selecting Deployment profile replaces task instructions with a profile and its parameters.
Date Placeholders
Automations resolve date placeholders each time a run launches, using the automation's timezone (or the environment's timezone when the automation has none). They work in the Task Name Template, the instructions, task template parameter values, and deployment profile parameter values:
{{date}}— the run date asYYYY-MM-DD{{datetime}}— the run date and time asYYYY-MM-DD HH:mm{{date:EXPRESSION}}— a date relative to the run date, asYYYY-MM-DD
An expression is an anchor with an optional offset:
| Anchor | Meaning |
|---|---|
today, yesterday, tomorrow | The run date and its neighbours |
start_of_week, end_of_week | Monday and Sunday of the run week |
start_of_month, end_of_month | First and last day of the run month |
start_of_quarter, end_of_quarter | First and last day of the run quarter |
start_of_year, end_of_year | First and last day of the run year |
Offsets are + or -, a number, and a unit: d (days), w (weeks), m (months), q (quarters), or y (years). For example:
| Expression | Run on 2026-09-03 resolves to |
|---|---|
{{date:today-30d}} | 2026-08-04 |
{{date:start_of_month-1m}} | 2026-08-01 (first day of the previous month) |
{{date:end_of_month-1m}} | 2026-08-31 (last day of the previous month) |
{{date:start_of_quarter}} | 2026-07-01 |
{{date:end_of_month+1d}} | 2026-10-01 |
Month, quarter, and year offsets shift whole periods, so end_of_month-1m always lands on the last day of the previous month. Offsets on today keep the day of month and clamp to the last day when the target month is shorter (January 31 minus one month is December 31; March 31 minus one month is February 28 or 29).
Under Run Configuration, when a task template has a date parameter, the automation editor shows a Fixed date / Relative to run date switch for it. Relative mode builds the expression from an anchor, an amount, a unit, and a direction, and previews the date it resolves to today. Use this for schedules such as "every month, pull comments from the first through the last day of the previous month." Saving shows an inline error beside the parameter if an expression cannot be understood, so a typo never reaches a scheduled run.
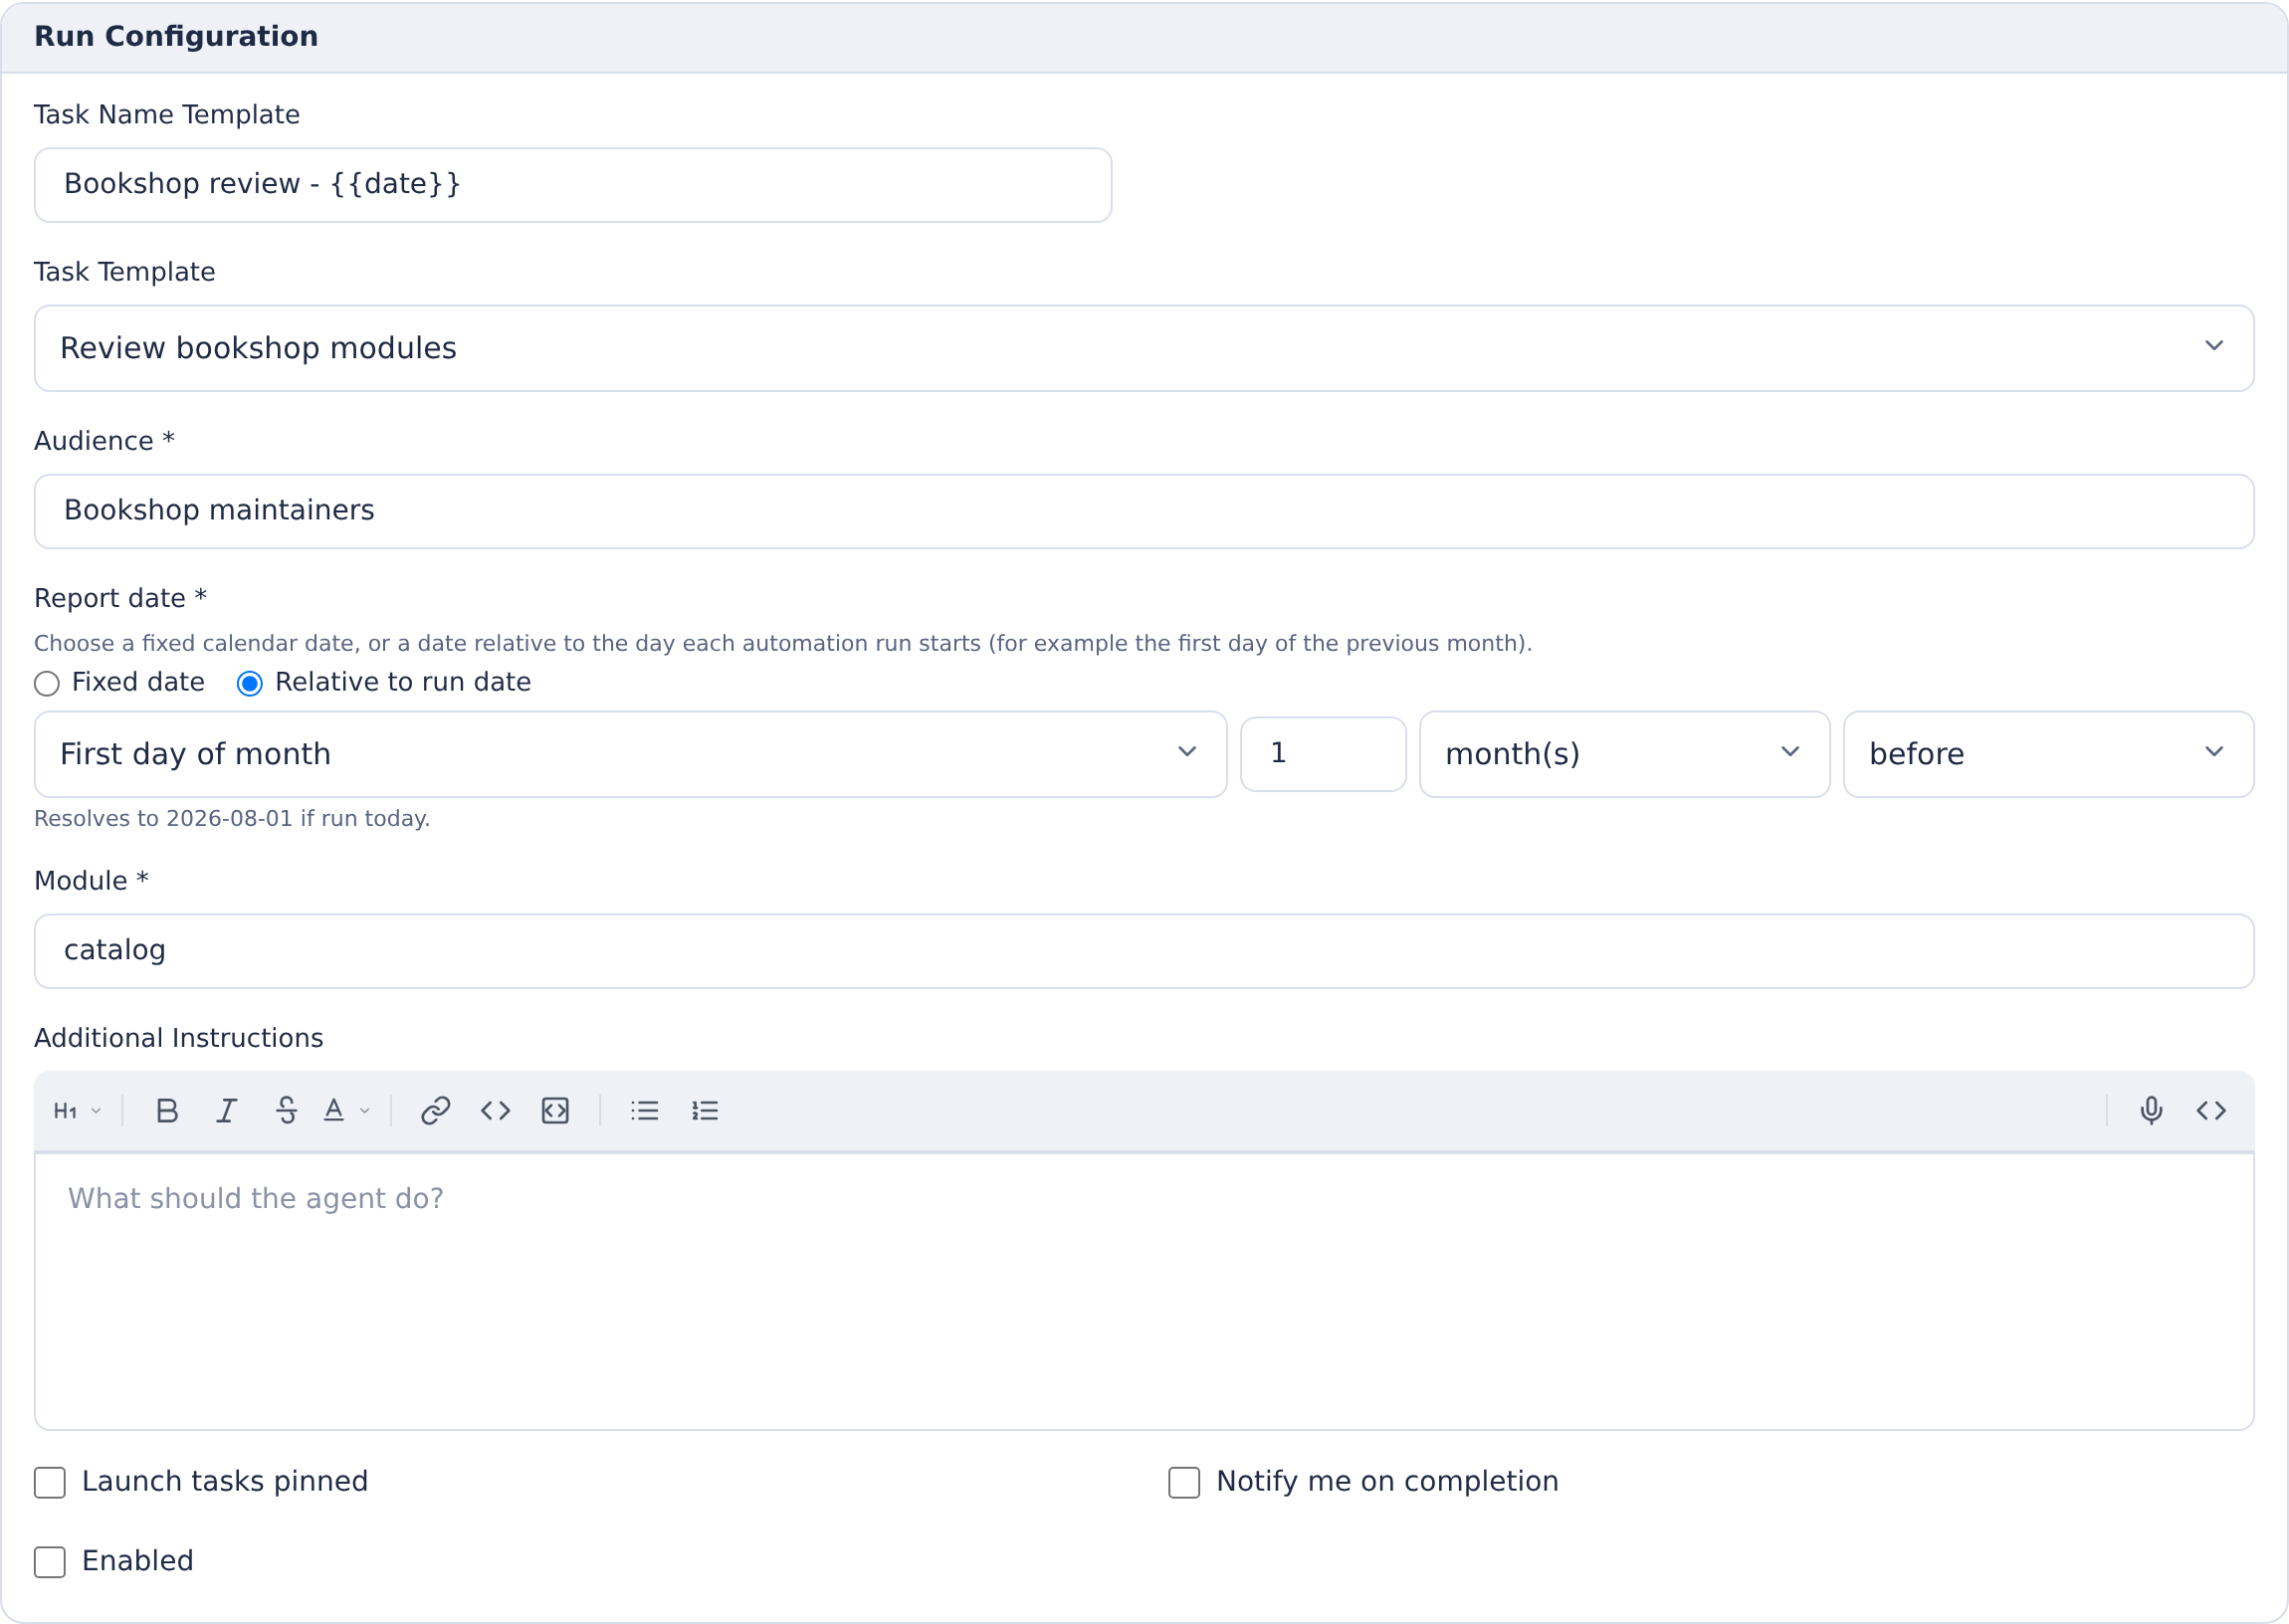
The preview shows what the expression resolves to today. Here, the first day of the previous month resolves to August 1; future runs calculate it again in the automation’s timezone.
IBM i Import Automations
The IBM i Import run target keeps a Git repository in step with source on an IBM i system. IBM i is pull-only, so each run is a scheduled poll: it enumerates the source members in the import profile, compares their change timestamps against the snapshot saved from the last successful sync, and acts only on what changed. An unchanged source library produces no diff, no task, and no commit.
Choose the IBM i Import card, then configure these fields in Run Configuration:
- Connection — the stored IBM i connection (SSH key or password) used to reach the system. See IBM i Connections.
- Import Profile — a saved selection from the Import IBM i Sources wizard that defines which libraries, files, and members to pull. Save one with Save as profile in that wizard.
- Build Rules Profile (optional) — also regenerates build rules from the changed IBM i objects after each import, reusing the Generate Build Rules pipeline. It must share the import profile's
objxlibrary. Leave it empty to sync source only. - On Deleted — what to do when a member that was present last time is now gone on IBM i:
- Ignore deleted members leaves local files alone.
- Mirror deletes treats the missing member as delete work in the outcome.
- On Conflict — what to do when a local file and the IBM i member have both changed:
- Prefer IBM i changes lets IBM i win.
- Skip conflicted files leaves them untouched.
- Flag in a task raises the conflict for review.
- Outcome — how the detected delta becomes a result:
- Auto commit and push writes, commits, and pushes the imported sources straight to the repository's branch. Deterministic, with no agent involved.
- Agent task hands the delta to an agent, which handles conversions and conflicts. The Agent panel and Task Name Template are hidden for IBM i Import; those overrides apply only to Custom instructions and Task template. To require human approval, enable Launch tasks pinned (and optionally completion notifications) in the automation settings; the created task then starts pinned for review.
- Branch (optional) — a Git branch override for the outcome. Defaults to the import profile's branch.
This automation runs headlessly and reads the connection's credentials directly — it works with any IBM i connection regardless of its Available For scope. But a connection scoped Tasks has its credentials injected into every task container in the environment, and Deploy into every deployment container. If this connection needs broader IBM i authority than an interactive user's own connection would, create it with Available For set to Automation only (and no IBM i Features checked — none apply outside Task/Deploy container use) so its credentials aren't exposed anywhere else. See Available For.
How the Snapshot Advances
Each automation stores the member snapshot from its last successful sync. The snapshot advances only after the outcome succeeds, so if a run fails (a download error, a rejected commit, an agent failure) the same delta is retried on the next tick rather than silently skipped. When a build rules profile is attached, the object snapshot it tracks advances under the same rule.
Prerequisites
- An IBM i connection with a stored SSH key or password, created under the environment's IBM i connections.
- An import profile saved from the Import IBM i Sources wizard.
- For reactive build rules, a build-rules profile from the Generate Build Rules wizard that targets the same
objxlibrary as the import profile.
Identity and Git Authentication
Personal and environment automations use different identities:
- Personal automation tasks use the owner's current user-scoped AI and Git accounts. Git author details, provider audit attribution, task ownership, permission-scoped tools, and concurrency accounting follow that user.
- Environment automation tasks use the configured app/provider identity. Provider audit logs show the app or bot identity rather than the administrator who created the automation.
Credentials are resolved when a run starts; they are not copied into the automation definition. If a personal account needs to be reconnected, the run is marked blocked and the automation is disabled with actionable guidance; re-enable it after reconnecting the account. Transient provider failures leave the schedule enabled for a later retry. If an environment automation targets a repository or branch that requires a real user identity, a scheduled push may still be blocked by the provider.
Webhook Triggers
Automations can also be triggered by inbound webhooks. Create a webhook from the Webhooks subtab, copy its inbound URL, and configure the external system to send a POST request to that URL.
The inbound URL has this shape:
https://<server>/api/webhooks/inbound/<token>
Webhook tokens are secret. Rotate the token if it is exposed, and use signature verification when the sender supports it.
For signature schemes, payload variables, delivery history, GitHub and Stripe examples, webhook-only ingress, and SCM polling, see Webhooks & SCM Triggers.
Optional Webhook-Only Ingress Listener
By default, inbound webhook routes are served by the main CoderFlow server. Production deployments can instead start a second webhook-only HTTP listener and expose only that port publicly while keeping the main CoderFlow application port private.
This is route and port isolation, not process isolation. The listener runs inside the same Node process as the main CoderFlow server, so it reduces the public HTTP route surface but is not a separate process, user, container, or privilege boundary.
Set one of the following before starting the server:
WEBHOOK_INGRESS_MODE=listener
WEBHOOK_INGRESS_PORT=3003
WEBHOOK_INGRESS_HOST=0.0.0.0
WEBHOOK_INGRESS_PORT by itself also enables listener mode. WEBHOOK_INBOUND_PORT and WEBHOOK_INBOUND_HOST are accepted aliases.
The webhook-only listener serves:
GET /healthPOST /api/webhooks/inbound/:token
It does not serve the CoderFlow web UI, authenticated APIs, webhook management APIs, or static assets. When using a separate public hostname or port, configure the external provider with that listener's base URL plus the inbound token path.
Schedule Notes
The schedule picker stores a cron expression internally.
Examples:
- Daily at 2:00 AM ->
0 2 * * * - Weekly Monday 9:00 AM ->
0 9 * * 1 - Monthly 1st at midnight ->
0 0 1 * * - Monthly 1st and 16th at midnight ->
0 0 1,16 * * - Every 30 minutes ->
*/30 * * * * - Every 30 minutes, 9 AM-5 PM, weekdays ->
*/30 9-17 * * 1,2,3,4,5
Managing Existing Automations
Each row in the Automations table provides:
- On/Off toggle to enable or disable scheduling
- Run Now to trigger immediately
- History to view recent runs and linked tasks
- Edit to update configuration
- Delete to remove the automation
Profile Settings lists only the signed-in user's personal automations, while the environment page lists only shared environment automations. Through the automation API, an administrator with automations:manage may inspect history, disable, or delete another user's personal automation, but cannot edit, enable, or manually run it. This prevents an administrator from changing instructions and then executing them with the owner's credentials.
Run History
History shows:
- Trigger time
- Trigger source (
manual,schedule,webhook, orscm-poll) - Run status
- Link to the generated task or deployment result
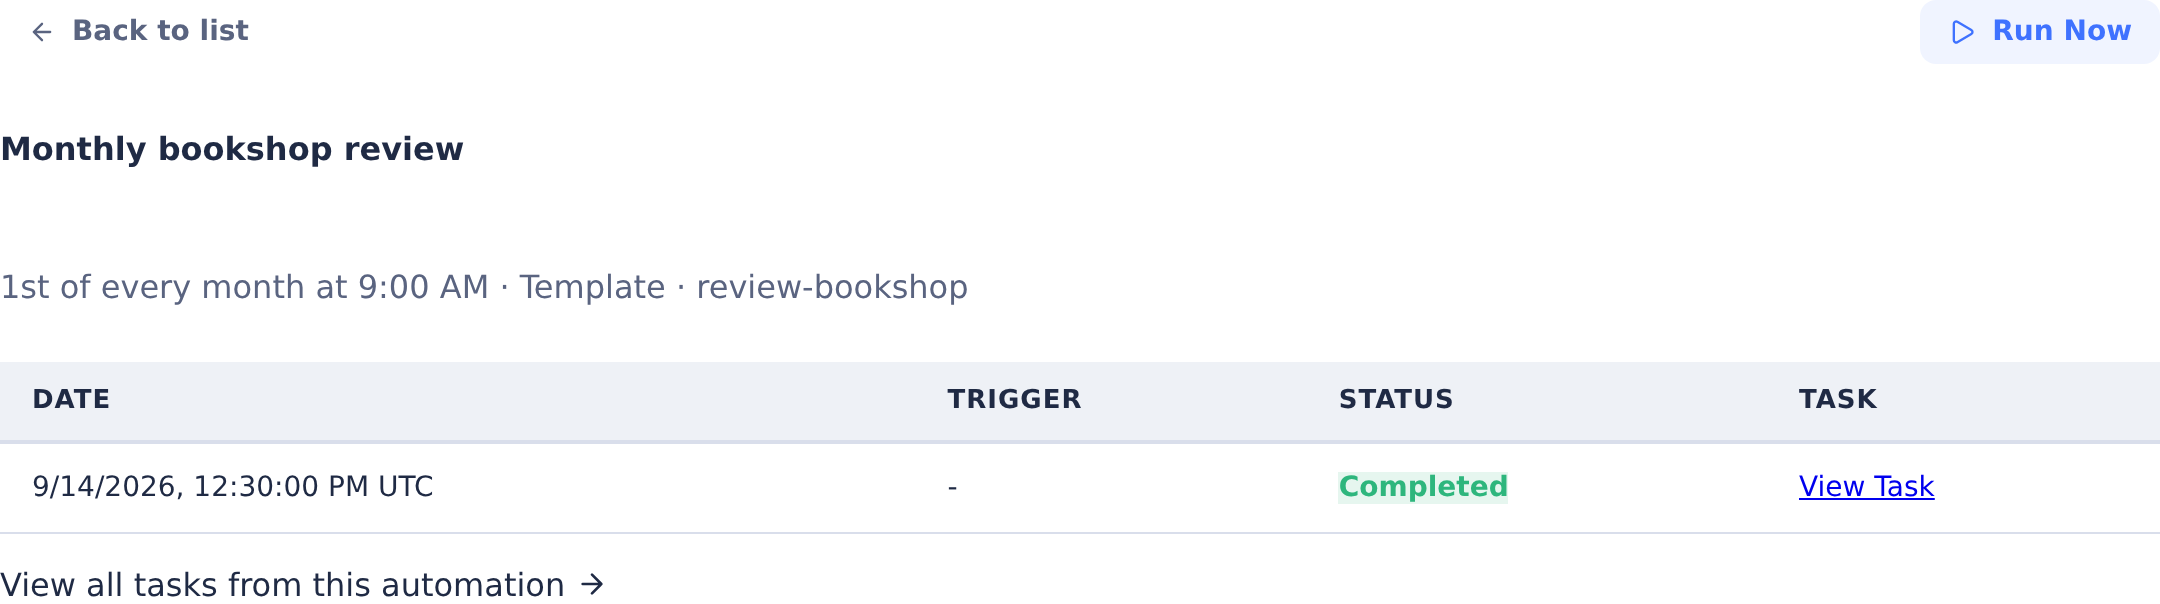
For SCM polling runs, history also shows the old and new commit SHA, commit message, and commit link when the provider supplies them.
Task-based automations can open the main task list filtered by automation. Deployment automations link to the environment's deployment history for the selected profile.
Task List Integration
Automation-created tasks can be filtered from the main task board with:
index.html?automation=<automationId>
When this filter is active, the task board shows a filter banner. Automation tasks also show an automation badge on task tiles linking back to the automation history view.