IBM i Connections
CoderFlow talks to IBM i systems through external connections configured per environment. Each connection enables one or more features — SQL, Build, SSH, Sync, Profound UI htdocs deploy, Agentic Display Files, or Interactive Sessions — and each feature has its own requirements on the IBM i side.
This page covers what those requirements are: what services must be running on the IBM i system, what authority the user profile needs, and how the Profound UI features are configured. For the field-by-field reference of the connection form itself, see Environments → Connections. For the day-to-day flows that use these connections, see Sync to IBM i, Import IBM i Sources, and Generate IBM i Build Rules.
For applications launched by Portal users, see IBM i Portal Applications. That setup includes a separate, administrator-managed user sign-on step.
Connection Basics
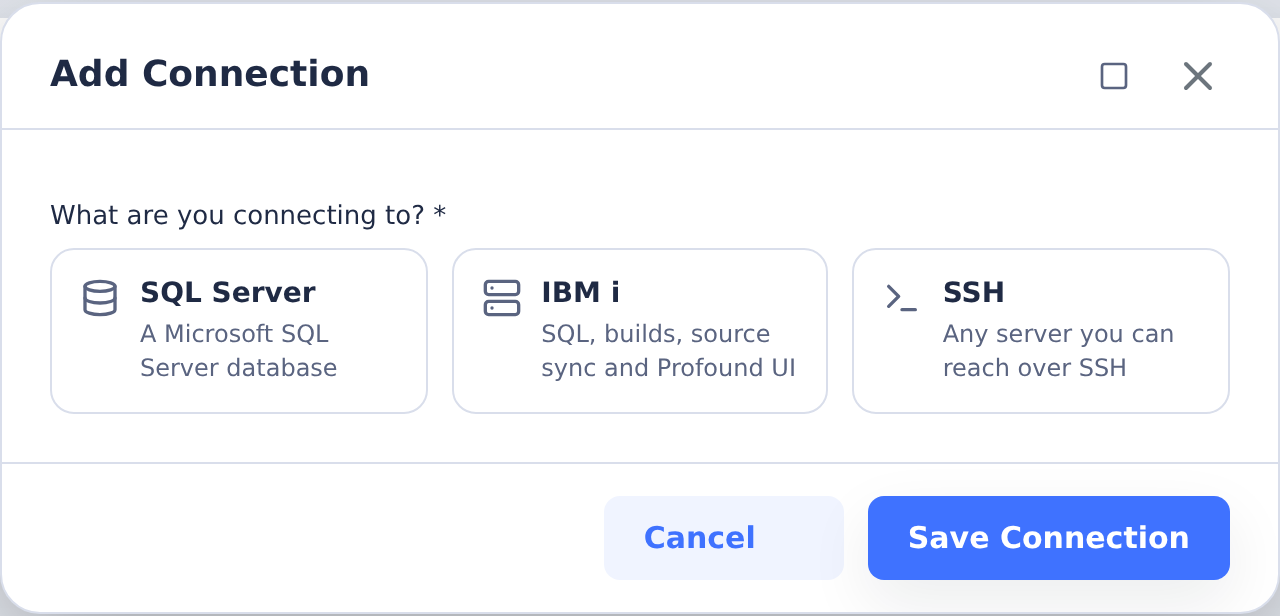
IBM i connections can be configured from the environment configuration page. Essentials also creates the connection during guided onboarding. To add one, choose the IBM i type card; no type is preselected. Existing connections open as Edit IBM i Connection. Use General for Name, Description, and Available For, and Server for the host and credentials. Each connection has:
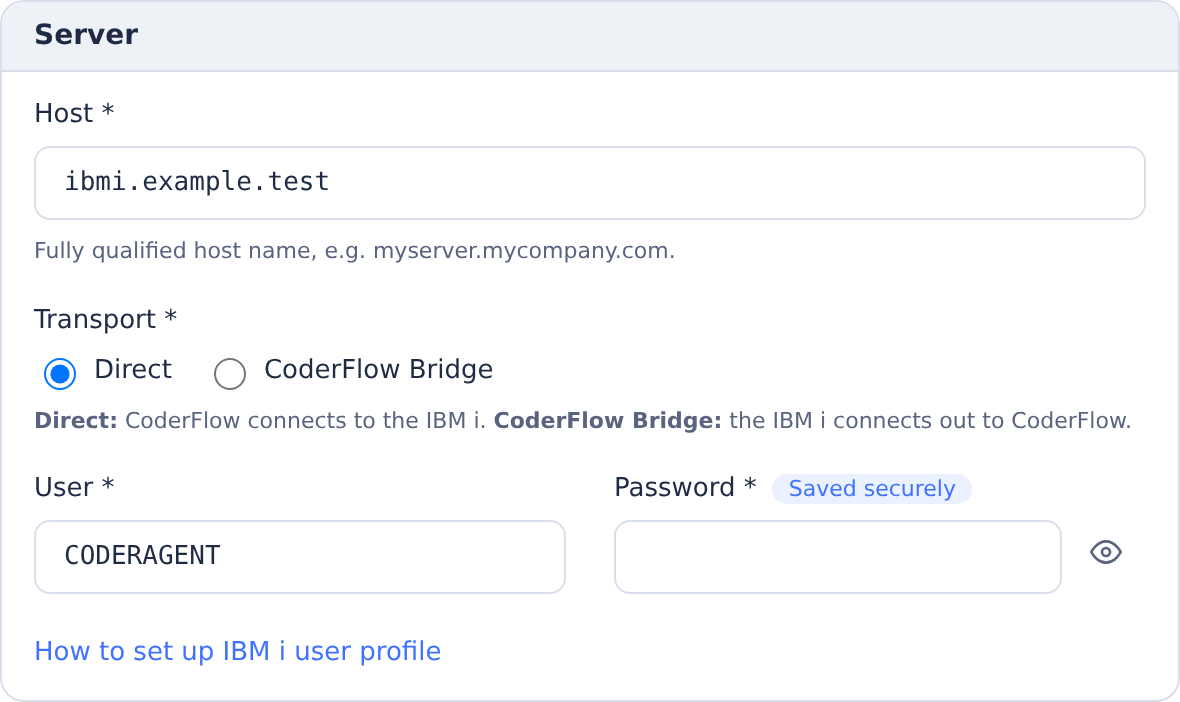
- Host — the IBM i system's fully qualified domain name (must match the FQDN regex; raw IPs are not accepted).
- User — the IBM i user profile CoderFlow authenticates as. Required when SQL, SSH, Build, Interactive Sessions, or Connection-mode sync/deploy is enabled.
- Password — required when SQL or Interactive Sessions is enabled (used by the RAS-backed
sqlskill and Profound UI authentication). - SSH private key — required when SSH or Build is enabled, or when sync/deploy is set to Connection credentials mode.
- Features — the set of capabilities that should be activated. Each feature has its own IBM i-side prerequisites, listed below. Features only apply to a connection scoped for Tasks or Deploy — an Automation-only connection needs none of them (see below), and the field is hidden for that case.
- Available For —
Tasks,Deploy,Automation, or a combination of Tasks/Deploy. Most connections use Tasks.- Tasks and Deploy connections are injected into every task or deployment container in the environment respectively — any agent task (or deploy script) can use their credentials.
- Automation connections are read directly by headless background automations (for example an IBM i Import automation) and are never injected into any task or deployment container. Use a dedicated Automation-only connection for a background job so its credentials aren't exposed to every task or deployment in the environment — especially important if that connection has broader IBM i authority than an interactive user's own connection would need.
A single environment can have at most one IBM i connection with the Build, Sync, or Interactive Sessions feature per scope. SQL-only and SSH-only connections can be combined freely.
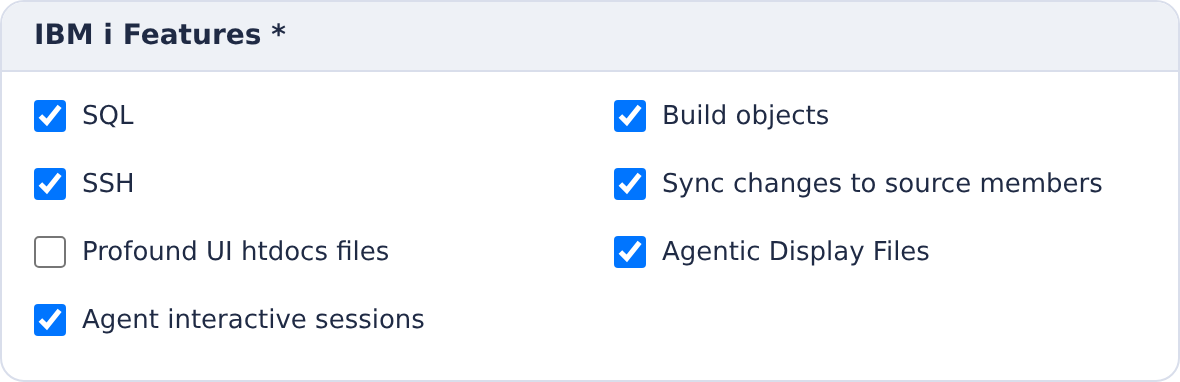
Available For also offers Portal Applications when Portal is enabled. Removing both Tasks and Deploy hides IBM i Features and shows a note; reselecting either scope restores the choices before saving. Feature choices are not saved while both scopes are off.
CoderFlow Bridge Connections
By default, CoderFlow reaches the IBM i directly — every feature makes an outbound connection from the CoderFlow server or task container to the IBM i. That requires a network path from CoderFlow to the IBM i, which a cloud-hosted CoderFlow usually does not have.
CoderFlow Bridge reverses the direction: the IBM i makes a single outbound connection to CoderFlow, and CoderFlow reaches the IBM i's services back through it. This lets an IBM i behind a firewall connect to a cloud-hosted CoderFlow with no inbound ports and no extra infrastructure. For the IBM i-side product — installation, the ADDCONN/CHGCONN/RMVCONN commands, and how the tunnel works — see CoderFlow Bridge.
The CoderFlow Bridge transport appears only on CoderFlow instances hosted by Profound Logic on coderflow.ai. On self-hosted CoderFlow, IBM i connections always use Direct transport and this option is not shown.
Choosing a Transport
When you add or edit an IBM i connection in the environment's Connections dialog on a cloud-hosted instance, a Transport option appears. In Essentials onboarding, CoderFlow guides you through Bridge setup automatically when needed.
In the Connections dialog, choose:
- Direct (default) — CoderFlow connects directly to the IBM i. Use this when CoderFlow has a network path to the IBM i.
- CoderFlow Bridge — the IBM i connects out to CoderFlow via CoderFlow Bridge. Use this when CoderFlow cannot reach the IBM i directly.
The Host field is the IBM i's real, fully qualified hostname either way — it is used for TLS and host-key verification even over the Bridge, so only the network path changes, not the system's identity. The field suggests IBM i hosts already used by other connections; picking an existing host reuses its Bridge (there is one Bridge per IBM i host, shared by every connection to it).
Enable features and enter the Profound UI Genie URL exactly as you would for a Direct connection — the selected features determine which ports the Bridge forwards.
Once you choose the CoderFlow Bridge transport and save, CoderFlow guides you through installing and starting the Bridge on the IBM i. For those details — the guided install wizard, checking connection status, and editing, re-keying, or removing a connection — see Setting Up a CoderFlow Bridge Connection near the bottom of this page.
SQL — Database Access via DB2
The SQL feature lets agents run queries against DB2 from inside the task container, using the sql skill.
On the IBM i system:
- Profound Logic Remote Access Server (RAS) must be installed and running. RAS is the network service the
sqlskill connects to — it offers materially better performance than direct ODBC/JDBC over network distances. Installation and configuration are covered in the Profound Logic RAS documentation. - The IBM i user profile needs database authority appropriate to what your agents will read or write — typically
*USEon the relevant schemas and*OBJOPR/*READon tables the agents are expected to query. - The user's password is required on the connection. SQL is one of the two features (the other is Interactive Sessions) that does not work with SSH-key-only authentication.
On the CoderFlow side: saving the connection auto-imports the sql skill for tasks in this environment, so agents can call it without manual skill assignment.

Build — codermake Compilation
The Build feature is what enables codermake inside the task container, lets agents compile RPG/COBOL/CL/DDS programs, and triggers per-task library creation.
On the IBM i system:
- The SSH daemon must be running and reachable from the CoderFlow server. Build is SSH-key-only — there is no password fallback.
- The user profile needs:
- Authority to create libraries (
CRTLIB) — task libraries are created on demand. - Authority to compile into the resulting library (typically through the user's normal
*ALLOBJor per-object grants on the source members). - QShell (
/usr/bin/qsh) accessible. CoderFlow runs DB2 andsystemcommands via QShell.
- Authority to create libraries (
- The user's home directory and
.sshdirectory must exist on the IFS forauthorized_keysto be written. The connection form's How to set up IBM i user profile helper generatesCRTDIR /home/<user>andCHGOWN/chmodcommands to bootstrap this. - The job description (JOBD) or the user's initial program should set up an appropriate library list. CoderFlow does not modify the IBM i library list during compilation — agents inherit whatever the user profile is configured for, and
codermakeadds the per-task build library on top.
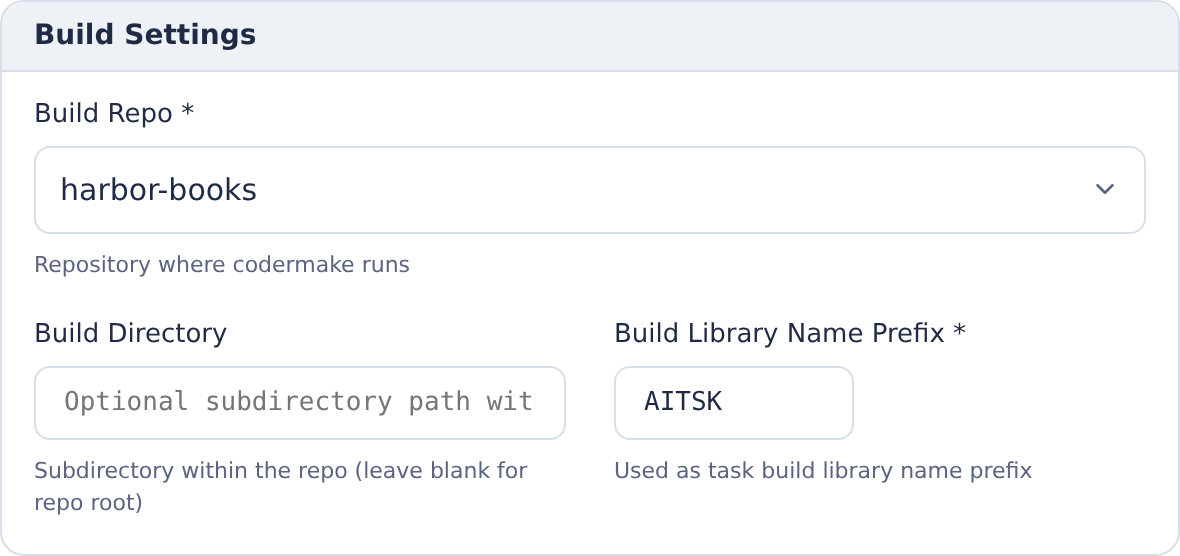
On the CoderFlow side: the connection requires three additional fields when Build is enabled — Build Repo (which environment repository codermake runs in), optional Build Directory (a subdirectory inside that repo), and Build Library Name Prefix (1–5 characters that prefix the per-task library name, e.g. AITSK). See Task Libraries for how the library is created and cleaned up.
SSH — Shell Access
The SSH feature gives agents the ability to run CL commands and arbitrary shell commands on the IBM i system through the ibmi-clcmd skill. It also acts as the SSH-key home for connections that use Connection-mode sync/deploy.
On the IBM i system:
- The SSH daemon must be running.
- The user profile must have a home directory on the IFS with
.ssh/authorized_keyswritable. The CoderFlow public key is appended viassh-copy-id-style logic when you use the Install Public Key on Remote button — that operation requires the remote user's password once but does not store it. - For CL command execution, the user needs
*USEon the commands the agent will run. CL commands are executed through QShell (system "...") so the user's QShell environment must be functional.
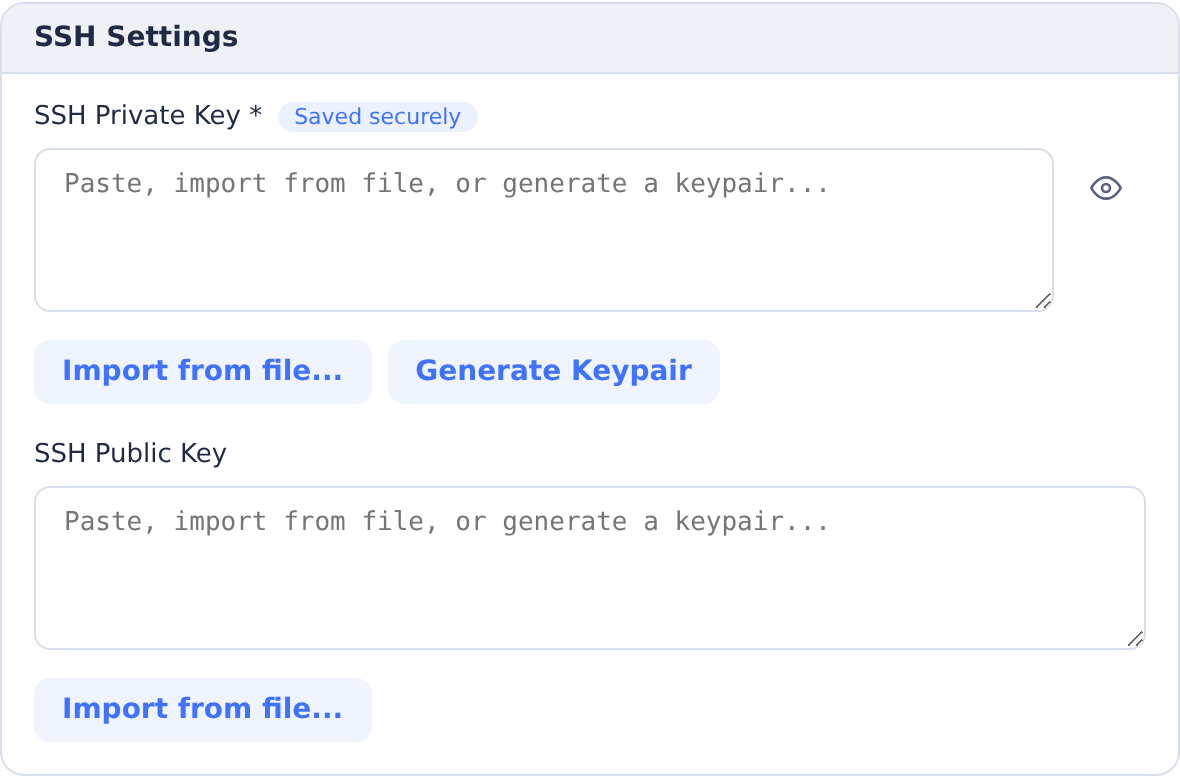
Sync — Source Member Sync
The Sync feature surfaces the Sync to IBM i flow. It writes changed source files from the task workspace into source members on a target IBM i library. Sync does not require task approval and can be run repeatedly across a QA cycle.
On the IBM i system:
- The SSH daemon must be running. Sync runs entirely over SSH — both for the script that creates libraries and for the
Rfile -Qwwrites that put member content in place. - The user profile (whether the connection's profile or the prompted one) needs:
CRTLIBif the target library doesn't already exist, or*USEand*ADDon the existing library.CRTSRCPFand*OBJOPR/*ADDon source physical files.ADDPFM,CHGPFM, and member-write authority for content updates.
- QShell must be functional —
Rfileand thesystemCL wrapper both run inside QShell.
Sync / deploy credentials is configured per connection:
- Prompt (default) — the operator enters a user profile and password each time. The operator's IBM i authority is what's used. No SSH key is required on the connection for sync alone.
- Connection — the connection's SSH user/key is used. The SSH feature must also be enabled, since Connection-mode sync reuses that SSH configuration.
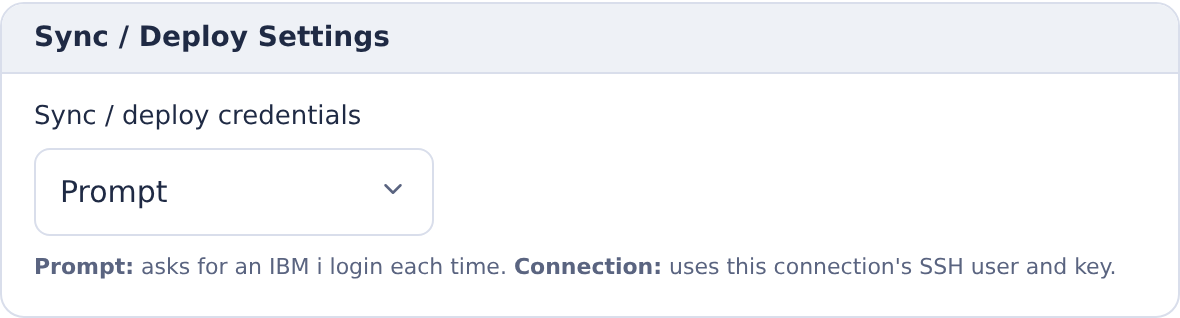
Profound UI htdocs Files and Agentic Display Files
These two features both deploy files to the Profound UI htdocs IFS path on the IBM i system. They differ in what additional capabilities they enable inside the task container:
- Profound UI htdocs Files — pure deploy. Files in
htdocs/profoundui/in the task workspace are pushed to the configuredpui_htdocs_pathon approval. - Agentic Display Files — adds the
ejs-screen-designerskill so agents can create and edit EJS screen overlays for RPG Open Access programs, and routes/profoundui/userdata/ui/*requests to files inside the task workspace (instead of the shared IFS) when the application server proxy is in use. This lets developers preview EJS templates, CSS, and JavaScript changes without touching the production IFS until the task is approved.
On the IBM i system:
- Profound UI must be installed at the path specified by PUI htdocs Path (e.g.,
/www/myinstance/htdocs). The path must be absolute and must not contain.or..segments. - The SSH user (whether prompted or the connection's user) needs write authority on the target IFS path. CoderFlow's deploy script copies files via
scpand creates intermediate directories as needed. - Both features require the Tasks availability scope; deploy doesn't make sense without a task to deploy from.
These features share the Sync / deploy credentials mode with source member sync. If the same connection has both Sync and a deploy feature, they use the same credentials policy.
Interactive Sessions
The Interactive Sessions feature lets agents drive 5250 terminal and Rich Display sessions through Profound UI for end-to-end testing of running applications.
On the IBM i system:
-
Profound UI / Genie Version 6, Fix Pack 41.0 (6.41.0) or later is required for interactive sessions.
-
Profound UI must be installed and reachable at the URL configured in the connection's PUI Base URL. The base URL's hostname must match the connection's host field — connections are validated to enforce this.
-
Two directives must be set in the global section of the Profound UI / Genie instance's
httpd.conf:SetEnv PUI_ALLOW_AGENTIC_TASK_LIB 1SetEnv PUI_ALLOW_CODERFLOW_PROXY 1PUI_ALLOW_AGENTIC_TASK_LIBlets Genie accept the agentic task library and add it to the library list.PUI_ALLOW_CODERFLOW_PROXYlets external file links on the Genie page (images, external scripts, and similar) work when the page is loaded through CoderFlow's Testing, QA and captured-screen proxies. -
A typical setup uses three URLs:
- PUI Base URL — for example
http://myibmi.mycompany.com:8080. Where Profound UI listens; HTTP and HTTPS are both supported. - PUI Render Path — defaults to
/profoundui/genie. Where rendered screens are served from. - PUI Launch Path — defaults to
/profoundui/auth/genie. Where new sessions are launched (used for the auto-generated launch URL on the application server).
- PUI Base URL — for example
-
The user profile must call
PUISETENVfrom its initial program so that the Profound UI Genie environment is initialized when the session starts. The connection helper dialog flags this requirement. -
The user's password is required on the connection — Profound UI uses HTTP basic auth, and CoderFlow forwards the connection's user/password automatically.
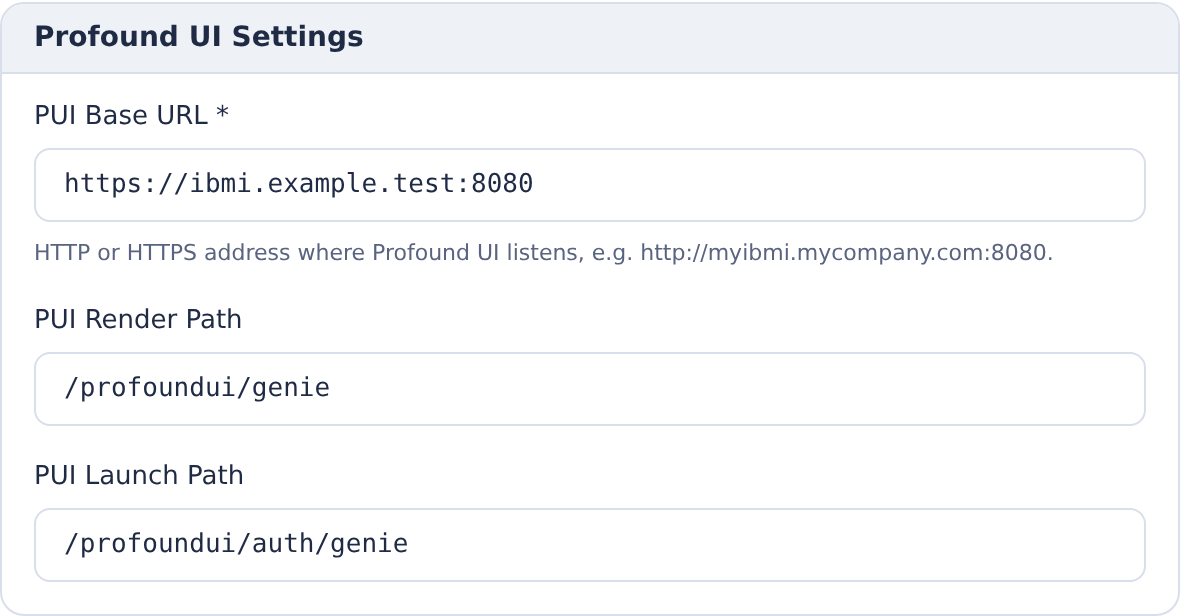
Guided installation and integration repair: Use Test connection to see the startup-page, installed web version, CoderFlow integration and (when using HTTPS) certificate findings separately. A successful HTTP response does not verify the two directives or a working interactive session. Configuration is inspected through an already authorized SSH channel, including the existing Bridge SSH forward where available; a network-only check reports configuration as cannot verify.
A guided Profound UI install now configures both directives in the global section of the selected instance's /www/<instance>/conf/httpd.conf. The vendor installer manages its own configuration and starts the instance; CoderFlow inspects the resulting file afterward, enables missing/disabled settings when safe, requests a selected-instance start/restart if needed, and rereads the configuration and HTTP job state. This is included in the install confirmation. If integration setup fails or cannot be verified after the product installs, the product installation remains complete and retains the Use … for interactive sessions hand-off. The result panel reports the remaining integration step separately; an actual product installer failure still reports an installation error.
For an existing installation, select its instance/port and choose Enable / repair CoderFlow integration…. The setup dialog uses an ephemeral administrator SSH session and explains the two changes and possible interruption of all Genie/Rich Display sessions on that instance. Checking alone never edits or restarts an instance. Already-correct settings cause no file write or restart. A previously saved change awaiting activation is retried by the same explicit action. While setup runs, the input fields are hidden. Its result focuses on the selected file, the two directives and activation status; use Test connection for the complete connection readiness report. View configuration file reads the selected httpd.conf without changing or restarting the instance, using the administrator credentials entered in the dialog. A read-only snapshot is also available after setup; closing the dialog clears it.
Configuration inspection, automatic repair and activation rechecks use the native PASE/QShell helper over the authorized SSH channel. They do not require Python or another RPM runtime on IBM i. Inspection requires read access to the selected file and its CCSID, plus private temporary storage; it does not write in the instance directory. Repair additionally requires authority to update the file, create recovery files and start/restart the selected HTTP instance. Native iconv conversion supports CCSIDs 37, 500, 1140, 819, 1252, 1208 and 367 when the corresponding conversion tables are available, with a lossless encoding round trip. Unsupported CCSIDs, failed reads or conversion failures produce cannot verify, never a negative inference. Resolve the reported inspection issue and recheck before deciding that edits or a restart are needed. Other encodings, inaccessible files, indirect paths, conflicting/duplicate directives, scoped settings, unresolved includes or substitutions require manual review. Literal unrelated Define settings are allowed. Missing global settings are appended after existing directives, including module loading. CoderFlow does not flatten includes or claim to calculate Apache's complete effective configuration.
Edits retain unrelated content, comments, line endings, the original IFS object, CCSID, ownership and authorities. Before writing, CoderFlow closes and rereads its private recovery files to verify them. Look for these artifacts in the selected instance's conf directory:
httpd.conf.coderflow-<id>.bak— the original file's binary recovery copy, where<id>is a 32-character hexadecimal identifier.<backup>.ccsid— the original CCSID, beside the backup (for example,httpd.conf.coderflow-<id>.bak.ccsid).httpd.conf.coderflow-integration.state— the four-line recovery record containing the backup identifier, CCSID, expected saved checksum and original checksum.<backup>.activated— the saved checksum recorded after the selected-instance activation checks succeed. Its absence during an interrupted repair is expected.httpd.conf.coderflow-lock— the directory used to serialize CoderFlow configuration operations. An interrupted operation can leave this lock behind; CoderFlow never automatically removes a stale lock.
The checksums use native cksum (CRC plus byte count), not a cryptographic digest. Later customer edits invalidate old activation evidence but do not by themselves block inspection or repair when the previous activation completed; existing backups and their sidecars remain available when a new repair replaces the current state record. A checksum mismatch against an unfinished recovery record requires administrator review. Failed writes attempt rollback and retain the recovery files. These checks do not promise fsync-level durability during power loss, and administrators must avoid concurrent external edits during repair.
If recovery is necessary, coordinate with the instance administrator, confirm no configuration operation is still running, inspect the current file, state record, backup and its .ccsid sidecar locally, and restore the backup bytes into the original file using binary I/O (preserving its CCSID and authorities). After validating the restored file, the administrator can remove httpd.conf.coderflow-integration.state and any stale httpd.conf.coderflow-lock directory, then recheck. Retain the backup and sidecars for reference. Legacy httpd.conf.coderflow-integration.json records and backup .json sidecars from the previous helper are not created by the native helper; an existing legacy record requires administrator review and is never automatically removed. Do not publish configuration files or recovery copies in logs or support messages.
When automatic repair is unavailable, use IBM HTTP Server administration or a CCSID-aware editor to enable the two directives shown above in the selected file's GLOBAL section, outside <Directory>, <Location>, <VirtualHost> and conditional containers. Review included files and scoped overrides with the administrator. Coordinate activation for only that instance: STRTCPSVR SERVER(*HTTP) HTTPSVR(<instance>) RESTART(*HTTP) for a running instance, or STRTCPSVR SERVER(*HTTP) HTTPSVR(<instance>) for an ended instance. Recheck from CoderFlow and start a new Genie session to validate task-library handling and external resources through Testing and QA. A saved configuration, an accepted restart command and observed HTTP jobs are reported separately from effective configuration in an interactive job, which remains unverified by the read-only probe.
HTTP and HTTPS: Profound UI does not need HTTPS. Captured Genie screens, including their runtime assets, are served through CoderFlow’s authenticated per-task proxy for both direct and Bridge connections. This keeps browser requests on CoderFlow’s origin, allowing an HTTPS CoderFlow site to work with an HTTP Genie instance. Testing and QA also use server-side proxies; agent sessions use the configured HTTP or HTTPS URL from the task container. The CoderFlow server and task container must be able to reach that URL (or its Bridge forward). Manually configured HTTP screenRenderUrl values also use the render proxy.
If you choose HTTPS, use a certificate trusted by CoderFlow and matching the connection hostname. Configure certificates through IBM HTTP Server administration / Digital Certificate Manager and add a private issuing CA through CoderFlow’s custom CA support when needed. The credential-free readiness diagnostic can detect Genie and its version with an untrusted certificate, but HTTPS runtime requests still enforce certificate verification. HTTP shows Not required for HTTP in the certificate check. HTTP leaves the direct CoderFlow-to-IBM-i hop unencrypted; choose HTTPS when you need encryption on that network. CoderFlow Bridge encrypts its tunnel using SSH independently of the PUI URL scheme.
Remaining prerequisites: Use Profound UI 6 Fix Pack 41.0 or later. Configure the connection’s user/password, render path (/profoundui/genie by default) and launch path (/profoundui/auth/genie by default). Keep PUI_ALLOW_CODERFLOW_PROXY enabled so Genie routes its assets through CoderFlow. Custom skins or applications that hard-code external HTTP resource URLs must use proxy-compatible URLs or HTTPS for those resources.
Ensure the configured sign-on profile, which may differ from the setup administrator, calls <product-library>/PUISETENV as or from its initial program. Use the library belonging to the selected installation; it need not be PROFOUNDUI or match the HTTP instance name. Adding that library to LIBL alone is insufficient. CoderFlow shows any unambiguous product-library evidence from the configuration but does not infer absence from a custom initial program it cannot analyze. The checked configuration summary can report met when the two directives, activation checks, minimum version and initial-program configuration pass, together with certificate trust if HTTPS is selected. This does not prove an interactive sign-on: a matching PUISETENV initial program is configuration evidence and still needs manual validation of the sign-on flow; customer initial programs and profiles are never rewritten. See Profound Logic's PUISETENV documentation.
Inside the task container: when Interactive Sessions is enabled, the application server's proxy is automatically pointed at the Profound UI base URL, basic auth is configured from the connection, an X-Agentic-Task-Lib header is added carrying ${IBMI_BUILD_LIBRARY} (so Profound UI can use the per-task build library), and a launch URL named Genie (<connection-name>) is added to the application server's launch URLs.
The ibmi-interactive-session skill is auto-imported, giving agents the API they need to navigate screens, enter data, press function keys, and capture output for task visualizations.
Rich Display Rendering
When Interactive Sessions is in use, Profound UI renders the IBM i job's display files — including any DDS, RDF, or EJS Rich Display Files in the task's build library — as HTML in the Genie web UI. CoderFlow records the resulting screens for the task's visualizations.
For Rich Display authoring, two paths are relevant:
- Sync to IBM i with
.jsonRich Displays: when source-member sync runs, EJS-template and traditional RDF.jsonfiles are converted to DDS and synced asDSPFmembers. See Rich Display Files. - Agentic Display Files: enables the
ejs-screen-designerskill so agents can create EJS overlays for Open Access RPG, and serves them from the task workspace before they're deployed. The companion htdocs deploy step pushes them to the IFS on approval.
SSH Key Management
For SSH-using features, the connection form provides three options for the keypair:
- Import from file — paste or upload an existing private/public key.
- Generate Keypair — server-side generation of a new RSA 4096-bit keypair (
ssh-keygen -t rsa -b 4096). Both fields populate automatically. - Install Public Key on Remote — appends the public key to the remote user's
authorized_keys. Requires the remote user's password once for the install operation only — it is not stored. The install is idempotent (usesgrep -qxF), so repeating it for an already-installed key is a no-op.
The Test connection action validates SSH connectivity using the values currently in the form (not the last-saved values), so you can adjust a field and retest without saving in between.
Install Public Key on Remote installs the bare public key; it does not add OpenSSH authorized_keys restrictions. On an IBM i that is reachable only from a known CoderFlow host, edit the installed line manually and prefix it with a source restriction:
from="192.0.2.10" ssh-rsa AAAA... coderflow
Use the source address or CIDR that the IBM i actually sees. This may be the CoderFlow host's NAT address rather than the address configured on the connection. Test both an allowed and a disallowed source before relying on the restriction.
After adding a from= prefix manually, do not run Install Public Key on Remote again for that key. The installer checks for an exact bare-key line, so it does not recognize the restricted line as already installed and appends a second, unrestricted copy. If the button is run again accidentally, remove the duplicate bare entry or apply the same restriction to it before considering the key secured.
Do not add a forced command= restriction unless the key and IBM i profile are dedicated to one narrowly defined operation and the forced-command wrapper supports it. Build, SSH, sync/deploy, and interactive agent workflows require different capabilities; a generic forced command can break them. A dedicated least-authority IBM i profile remains the primary control.
IBM i User Profile Setup Helper
The connection form includes a How to set up IBM i user profile dialog that generates copy-paste-ready CL commands for bootstrapping a new service-account profile. The commands are tailored to the values you've entered in the form (user name, password if you've typed one):
CRTUSRPRF USRPRF(<USER>) PASSWORD(<password>) USRCLS(*USER) INLMNU(*SIGNOFF) LMTCPB(*YES) TEXT('CoderFlow service account') SPCAUT(*NONE) JOBD(JOB_DESCRIPTION)
CRTDIR DIR('/home/<user>')
CHGOWN OBJ('/home/<user>') NEWOWN(<USER>)
QSH CMD('chmod 755 /home/<user>')
Each command can be copied individually. Manual setup steps not covered by the helper:
- Configure the user's JOBD (or initial program) to set up the appropriate library list for the agents' work.
- For Interactive Sessions, ensure
PUISETENVis called as part of the user's initial program so the Profound UI environment is ready when the session starts. - SSH public key installation is handled by the Install Public Key on Remote button, not by the CL helper.
Test connection
In the connection dialog footer, choose Test connection. Results appear in Connection checks so you can review SQL and SSH access, the runtime profile’s special authorities, and the selected services’ configuration. Read each result separately: Passed, Needs attention, and Could not check distinguish successful checks from issues and incomplete inspection. For Genie, an available startup page does not prove a working interactive sign-in.
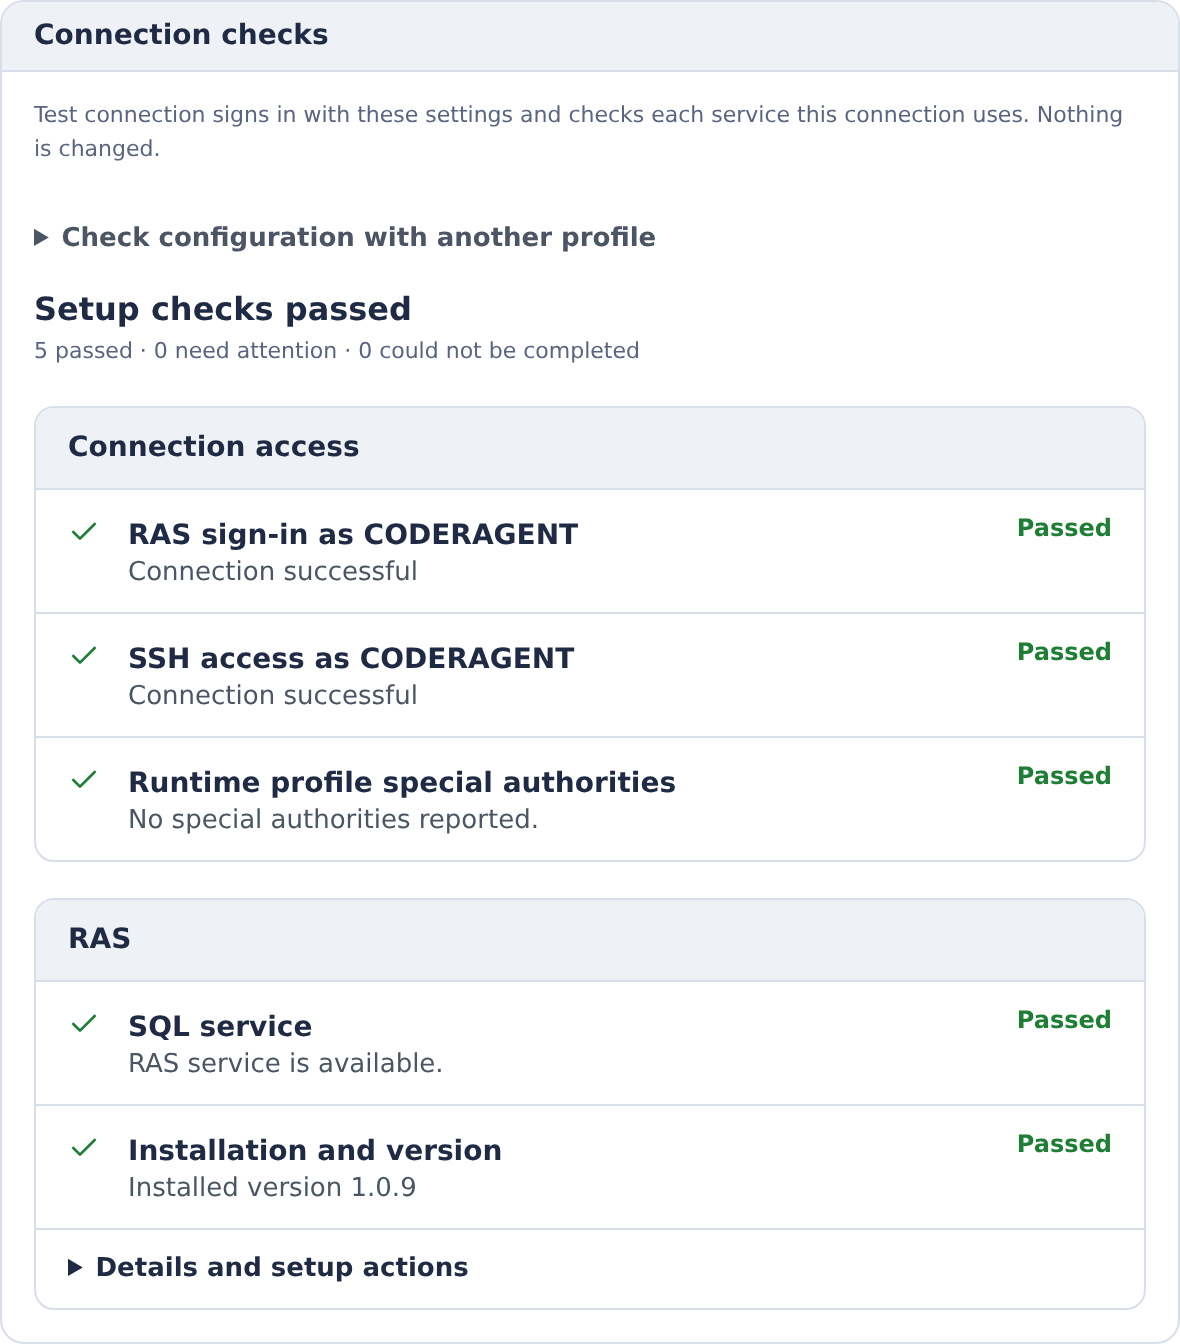
This example shows SQL and SSH checks. With Interactive Sessions enabled, also review the separate Genie findings.
For configuration inspection with temporary credentials, expand Check configuration with another profile. Its password is Not saved. The connection password and SSH private key are marked Saved securely.
The preflight requirement (Block task startup if this connection fails its preflight check) is in the collapsed Advanced panel, whose summary shows Preflight: warns only or Preflight: blocks task startup. Save highlights all invalid fields together and shows a summary at the top.
Skills Auto-Import
Saving an IBM i connection automatically imports and assigns the relevant skills to the environment, so agents have the tools they need without manual skill management:
| Feature | Skill Auto-Imported |
|---|---|
| SQL | sql |
| Build | codermake |
| SSH | ibmi-clcmd |
| Interactive Sessions | ibmi-interactive-session |
| Agentic Display Files | ejs-screen-designer |
| Profound UI htdocs Files | (none — deploy-only) |
| Sync | (none — server-side flow only) |
Skills are only added, never removed. Deleting a connection does not unassign its skills — that's a manual cleanup step in the environment skills configuration.
Setting Up a CoderFlow Bridge Connection
Start with the path that matches how you are setting up CoderFlow:
- Essentials onboarding — connect your IBM i while importing your application sources.
- Connections dialog — configure an IBM i connection through the environment settings.
Both paths guide you through the same IBM i-side Bridge installation.
Essentials Onboarding
After connecting your source, the Bring your AI provider step explains the separate API key needed for Ask CoderFlow and automatic helper features when you use a Claude subscription. You can continue without it; see Essentials AI provider setup for the feature list and add-key flow.
On a cloud-hosted Essentials instance, Bridge setup is part of connecting your IBM i for source import:
- In the Connect your IBM i onboarding step, click Connect and import source.
- In the importer, enter your IBM i Host, User, and Password, complete any enabled SQL-access settings, and click Connect.
- If a Bridge connection needs to be set up, CoderFlow opens Set up CoderFlow Bridge. Follow the wizard to install the Bridge, choose the IBM i-side connection name, and run the generated
CODERFLOW/ADDCONNcommand in a 5250 session. If Bridge is already installed, skip the installation step as directed by the wizard. - Copy the public key displayed on the IBM i into the wizard and click Enter public key. Leave the IBM i public-key display open until CoderFlow saves the key and prompts you to continue.
- Return to the IBM i public-key display and press Enter. CoderFlow waits for the Bridge connection and SSH service to be ready, then continues source import automatically.
CoderFlow creates and saves the connection during this flow. If a working connection already exists for your IBM i, it reuses that connection; if the Bridge needs attention, the wizard guides you through reconnecting it.
Connections Dialog
In the environment's Connections dialog, add or edit an IBM i connection, select the CoderFlow Bridge transport (see Choosing a Transport), and save.
Saving a CoderFlow Bridge connection launches the Set up CoderFlow Bridge on IBM i wizard:
- Install CoderFlow Bridge — download
cfinstall.savf, transfer it to the IBM i, and install it from a TN5250 session. The wizard shows the exact commands; the IBM i-side details (requirements, authorities, components) are on the CoderFlow Bridge page. - Name the connection — choose the IBM i-side connection name (
CONN), which defaults toCODERFLOW. - Run the generated command — copy the
CODERFLOW/ADDCONNcommand the wizard generates (it already contains your destination, connection name, and forwarded ports) into your 5250 session. It opens the connection and displays the CoderFlow Bridge public key. Paste that key into the wizard and click Enter Public Key.
When you finish, CoderFlow saves the connection and prompts you to press Enter on the IBM i's public-key display screen to start the connection. Click OK, and the status indicator updates.
There is one key per IBM i host, shared by every connection to that host. Pasting a new key re-keys the Bridge for all of them.
Connection Status
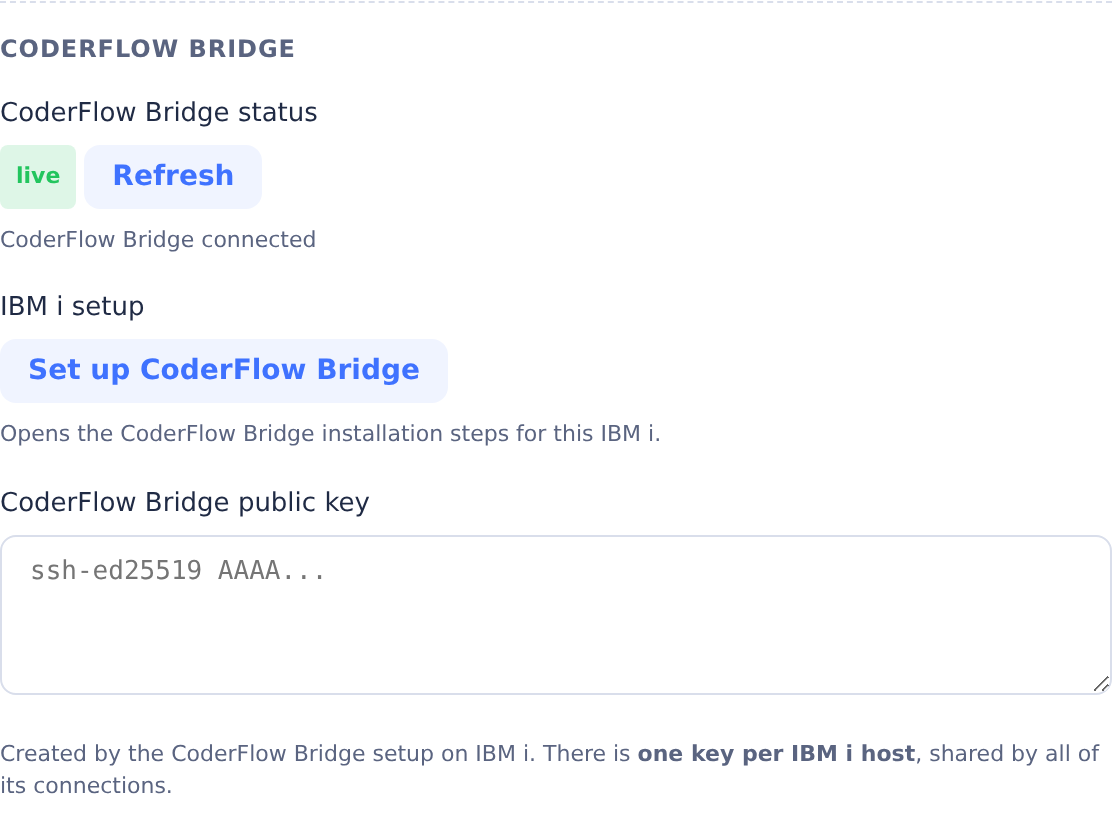
The CoderFlow Bridge group shows status first, followed by setup and the saved public key, which is read-only. A connection shows a live / offline status with a Refresh button; it becomes live once the IBM i has dialed in. Test connection tests SQL and SSH access only once their required forwards are live. Install Public Key on Remote also requires its SSH forward to be live — until then they prompt you to finish the Bridge setup first.
Editing, Re-keying, and Removing
- Changing the forwarded ports — for example editing the Genie URL or port, or adding or removing a feature — prompts the wizard to show a
CHGCONNcommand to run on the IBM i. - Re-keying — a saved public key is read-only. Choose Replace key… and confirm the warning that every connection on that host will be re-keyed before entering a replacement. Keep current key cancels the replacement. You can also run
CHGCONN CONN(<name>) KEY(*REGEN)on the IBM i. This re-keys the whole host. - Switching back to Direct, or deleting the last connection that uses a host, tears the Bridge down.
- The Set up CoderFlow Bridge button re-opens the wizard at any time.
Restrictions and Common Pitfalls
- An environment can have at most one IBM i connection with Build, Sync, or Interactive Sessions per availability scope. SQL-only and SSH-only connections can be combined freely. The form rejects a save that would create a second build/sync/interactive connection in the same scope.
- Interactive Sessions requires the Tasks scope. It does not make sense for
deploycontainers, which have no agent. - Connection-mode sync/deploy requires the SSH feature (since it reuses the connection's SSH key). Validation rejects a save without it.
- The PUI Base URL hostname must match the connection's Host. A mismatch is rejected at save time — for example, you can't point a connection at
myibmi.mycompany.comand put the PUI base URL atpui.example.com. - The Build Library Name Prefix must be 1–5 characters, first character
A–Z,@,#, or$; remaining characters letters, digits,@,#,$,_, or.. Anything else is rejected. See Task Libraries for how the prefix is used.